Happy November! Can’t believe the months are flying by so fast! I woke up Saturday and was like, “OMG, I better get on my holiday craft projects or else I won’t have any posts up in time!” You know, last year I was such a late starter with my holiday decor and worked well into December that I didn’t get to post all of my projects! Seriously! So this year I’m well ahead y’all. With some projects from last year that I couldn’t post and some that I tackled over the weekend I’m better prepared. But before we jump into any holiday talk we have some unfinished business with my DIY orb chandelier.
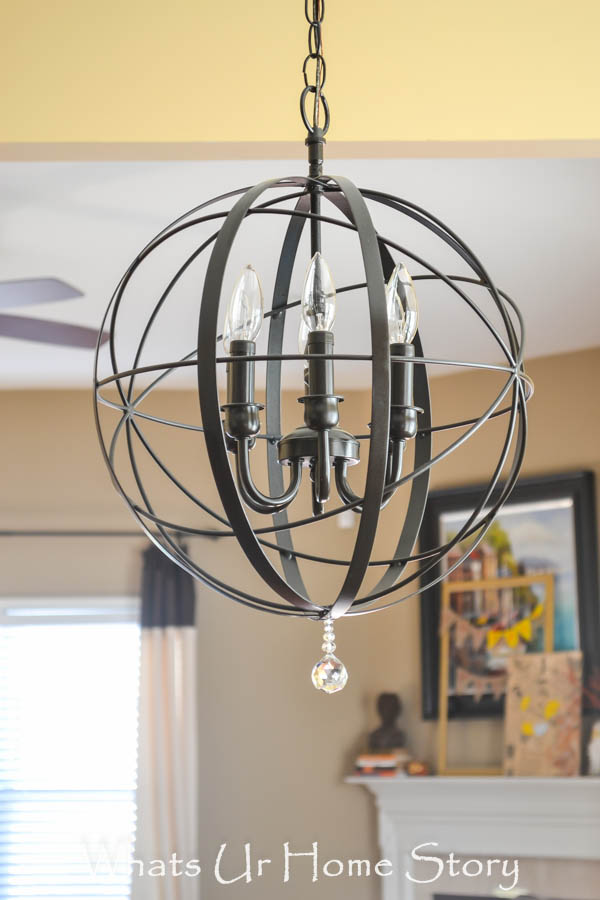
Don’t you want to know how I made this beauty?
As they say, it all started at HomeGoods……………when I came across this Blue orb.
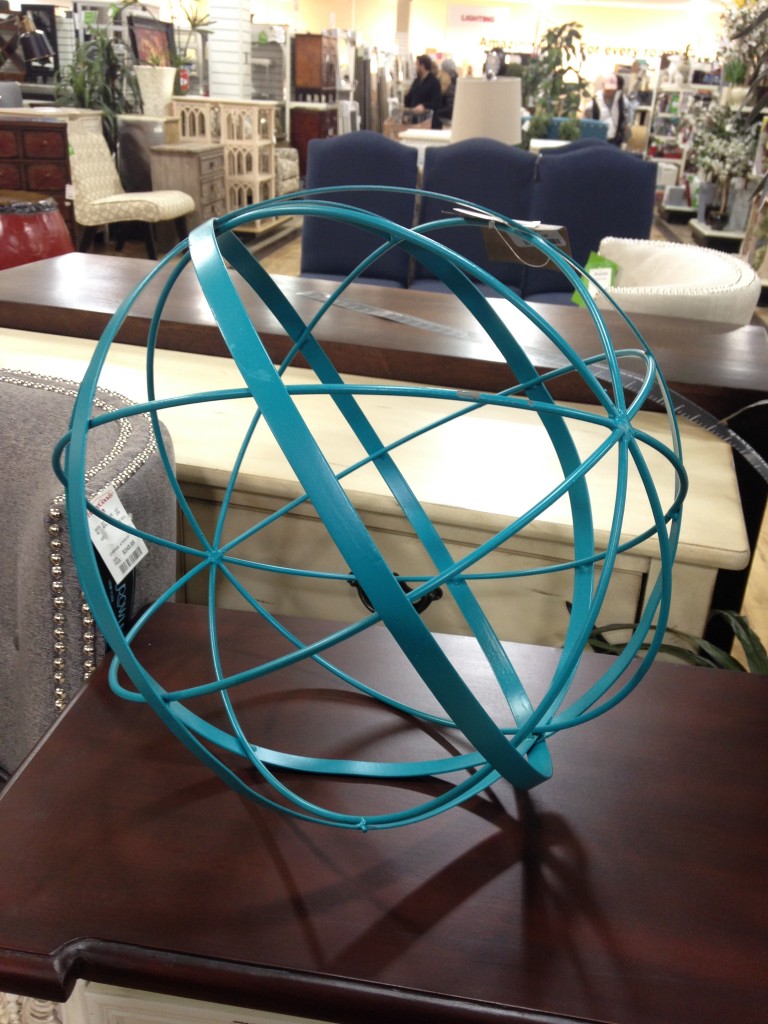
We had been debating at lengths about changing out our standard builder fixture over the breakfast table but couldn’t zero in on what we liked. Then one day I saw the orb and literally I could hear the angels sing, the birds chirping over my head, I was out in this beautiful meadow running around in glee……..all while I was desperately clutching onto this orb (for fear that someone else might take it if I kept it down even for a minute) at our local Home Goods. Perfecto! Surprisingly B was also on board with the idea of an orb chandy. If you are a regular here you’d know he is one tough cookie when it comes to visualizing and giving the nod at the first go.
My plan was to add an industrial bulb in there and call it day. But B and my dad were totally not buying it. They were like, “If you are doing it, do it right. Make it grand and graceful. One bulb over the breakfast table will not provide enough light.” Had to admit that the last point was indeed true, our breakfast area is very open and did need more light. I showed them a bunch of designer orb fixtures and we narrowed in on the Z Gallerie one. In retrospect I’m so glad I went with their idea rather than mine. That light fixture inside the orb made all the difference!
Off to Craigslist to find a chandelier for inside the orb. It took weeks of searching and at least 2 fallen deals (where the seller commits and then is never heard of again when you ask for the address to pick up) to finally find the right one.
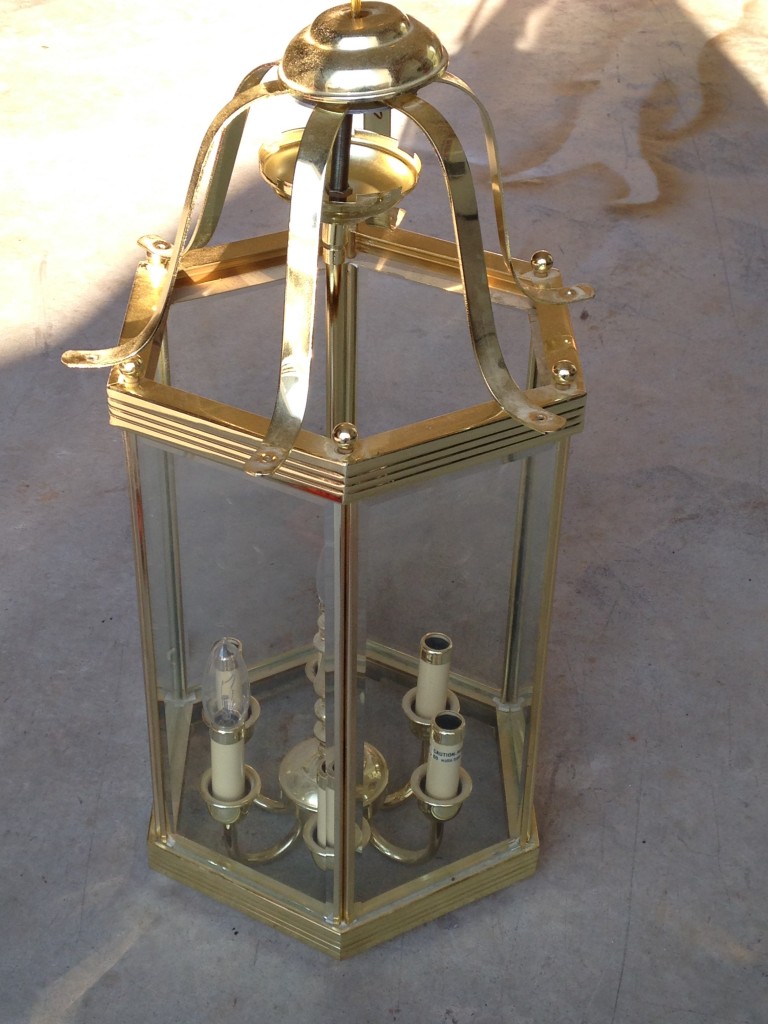
There is back story for this one too. The seller agreed to my price ($10 ) though he had listed for double that and to a pick up date. But on the day of the pick up I kept asking him for the address, even spoke to him but nothing. So I texted/ emailed him asking if I could come the next weekend. Still nothing. I kinda sensed that this was going nowhere and moved on. Another week passes and he emails me asking if I was still interested. Again we agreed on a pick up date and just as I was about to leave the house he finally gives me the address (only then not a minute before)!
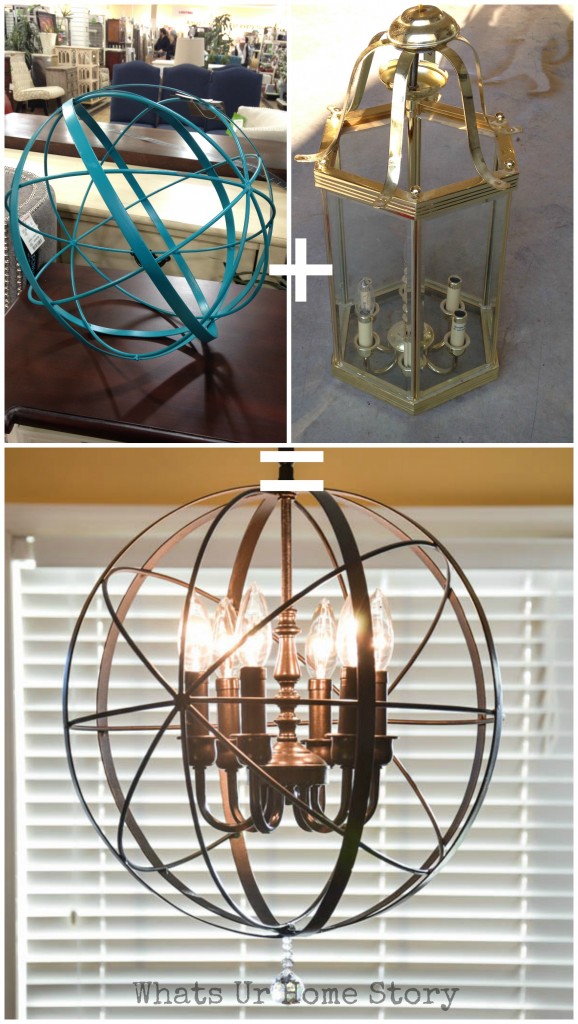
So what do you need to take these 2 and make a pretty orb chandelier?
Materials
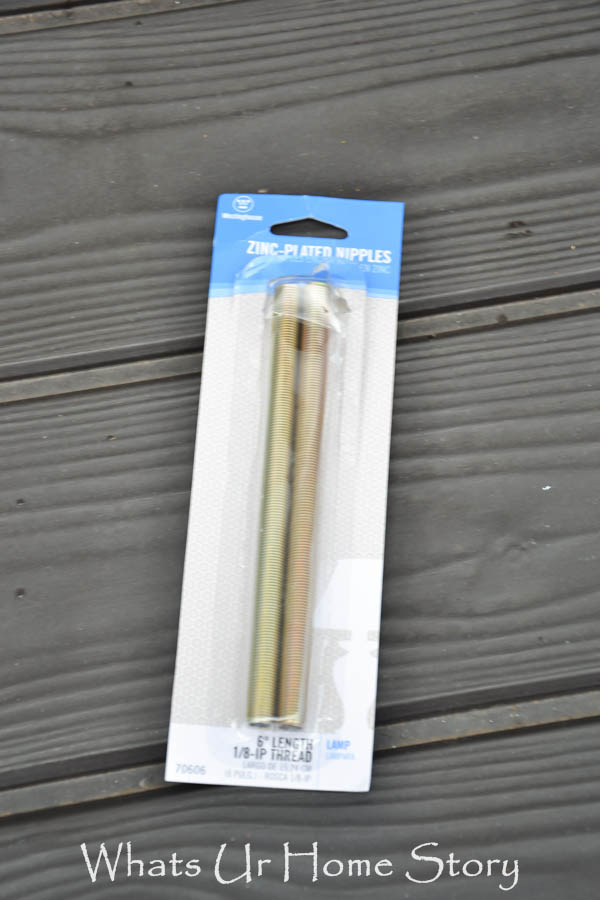
Orb – $15 – HomeGoods Carriage Light Chandy – $10 Craigslist Oil Rubbed Bronze Spray Paint -$4 -Home Depot Black Spray Primer – Already had Zinc Plated Nipples – $6 – $Home Depot 30mm Crystal Ball PrismBy the way this is how the zinc plated nipple looks like. 🙂 It is just a rod with threads on the outside, no idea why it is called that!
Method
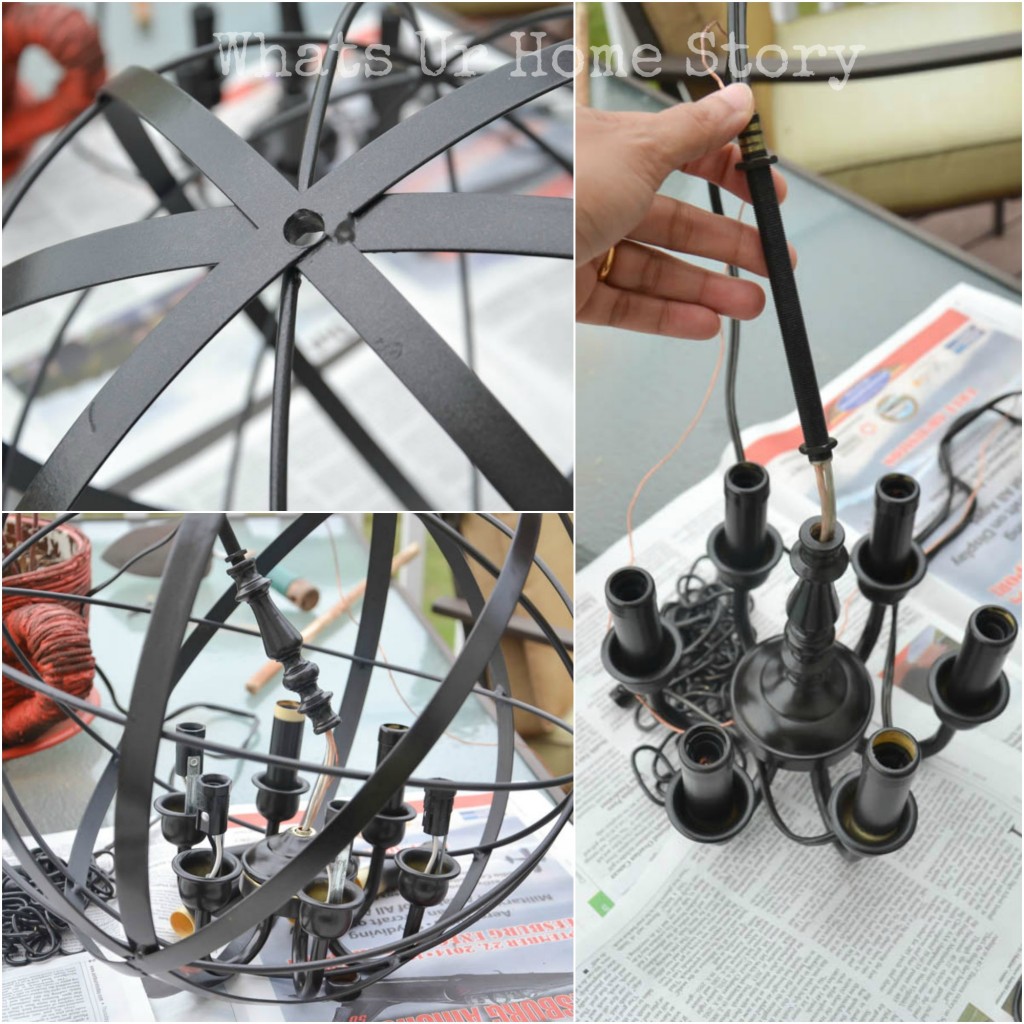
- First of all you’ll need to see if the chandy you’ve picked will go inside the orb and how tall your connecting rod (the Zinc plated nipple in this case) need to be.
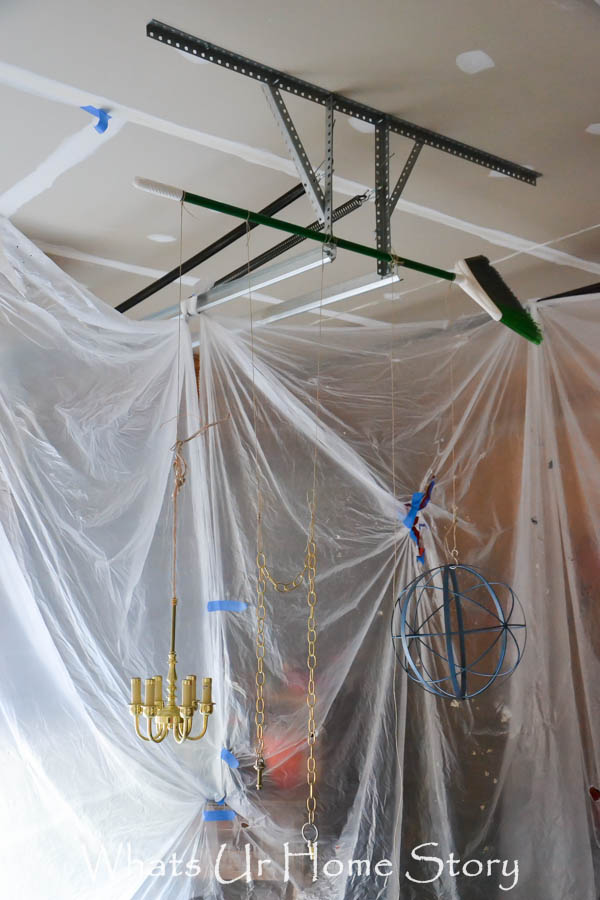
- Re-wire the chandy with the wire you’ll be using. We moved the chandy a little bit off center of the room. So we ended up using new wire, chain, and an extender hook. But if you are just replacing your old fixture you can use the same wires and chain.
- Build a spray painting fortress in your garage with drop cloths and go to town with spray paint. Remember to spray paint the orb, chandy, chain, and wire (or you could use brown wire). As always, go with thin even coats. Took me about 3 coats. You could insert a piece of paper towel into the light bulb holders so that no paint gets in there.
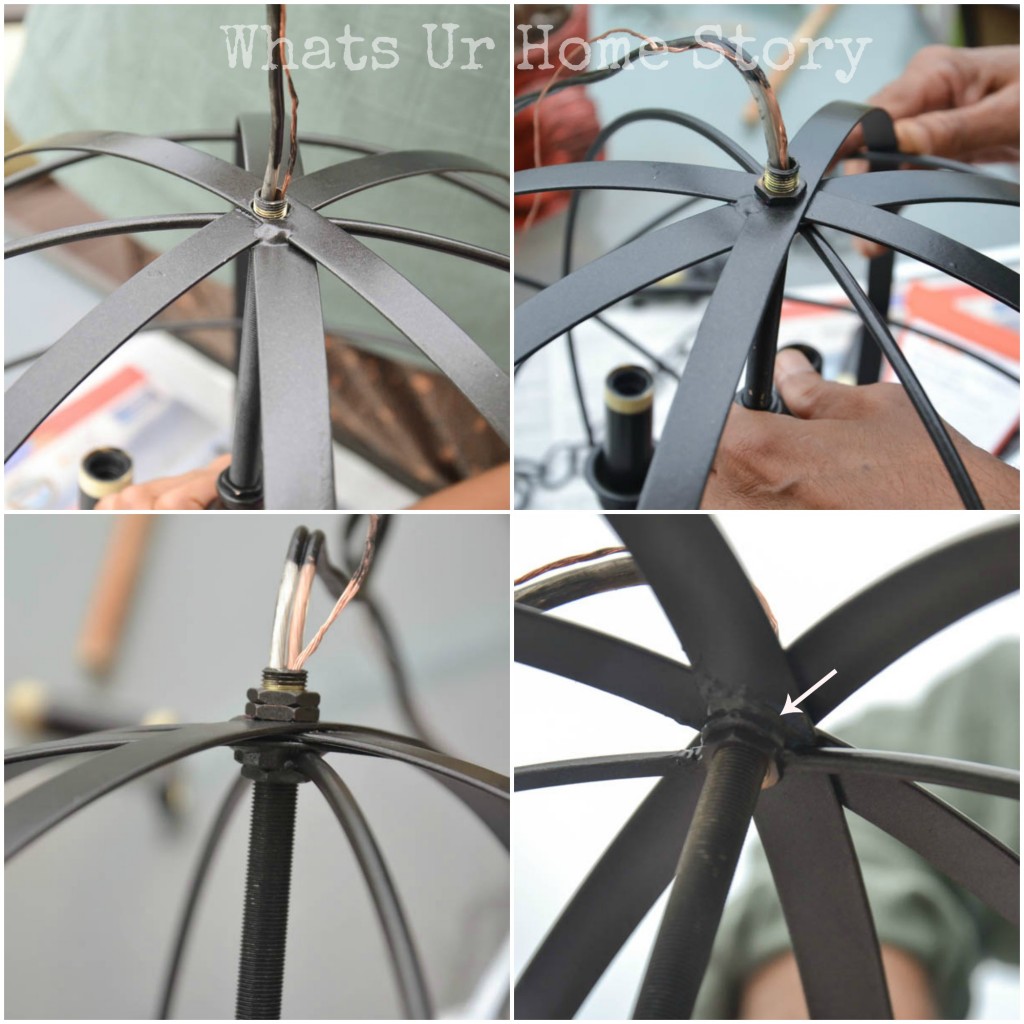
- Once the spray paint is dry, drill a hole on the orb for the wiring.
- Thread 2 nuts on each end of the zinc plated nipple and run the wire through it.
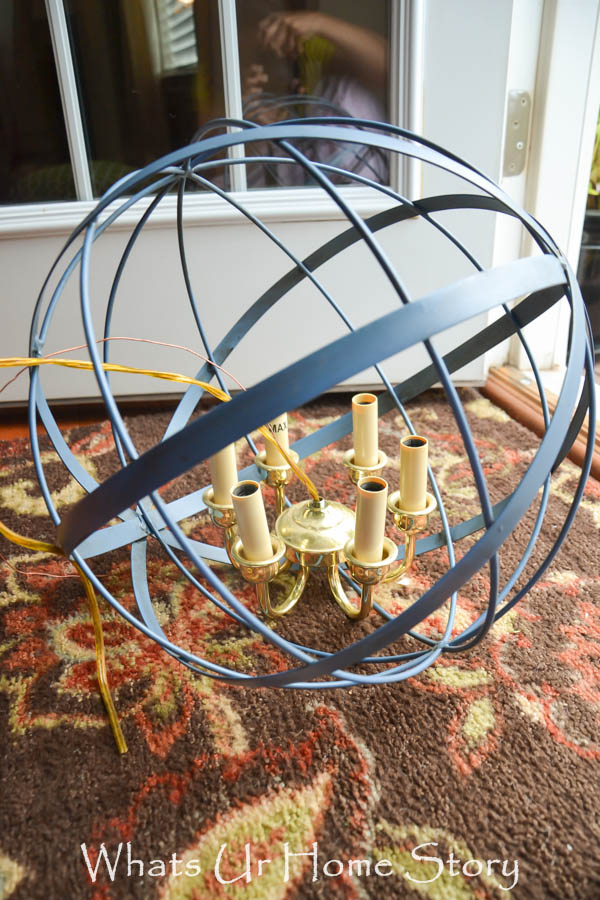
- Now slowly place the chandelier, nipple, and everything inside the orb.
- Adjust the height of the light inside the orb so that the some of the zinc plated nipple/ rod comes out through the drill hole. The rod should be long enough to screw into the hanging hook mechanism. Secure it with 2 nuts on the outside. This is where you’d need an extra pair of hands to help ya.
- Our drill hole was a bit off center as that was the only place we could drill the way the orb was welded. So on the underside my dad used some epoxy glue to balance the nipple so that it would hang straight (see the arrow in the below pic).
- Screw the nipple/rod to the hanging hook. We used the same one from our old fixture.
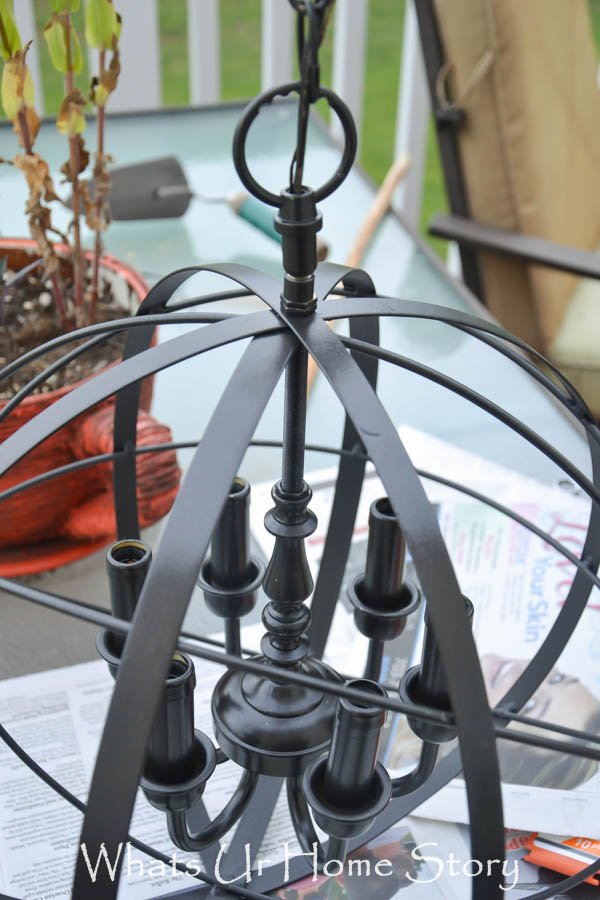
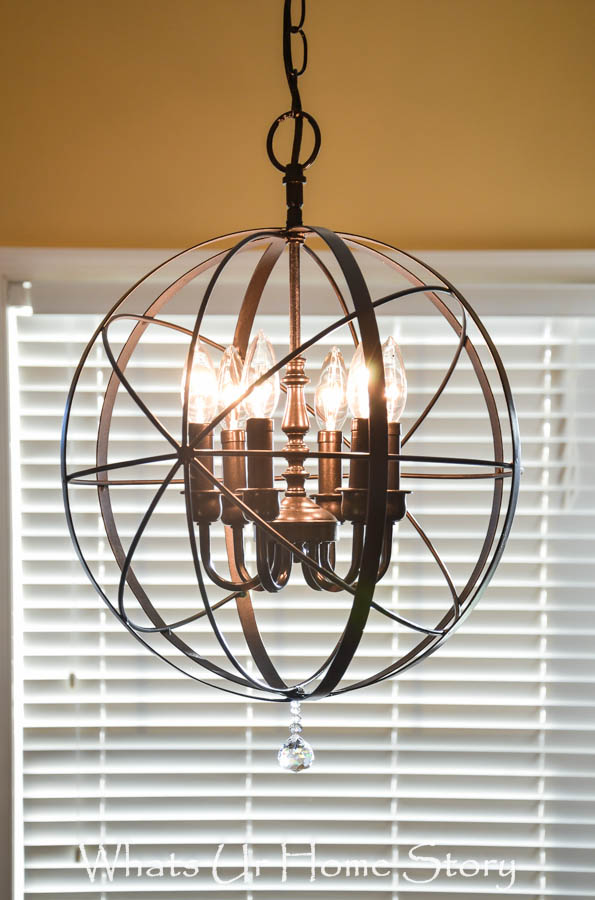
- The chandelier was looking pretty as is at this stage but we wanted a little bling and went with adding a crystal prism to the bottom. The crystal prism came already strung on a fish line. So all we had to do was drill a tiny hole on the bottom of the orb with the smallest drill bit and tie it through.
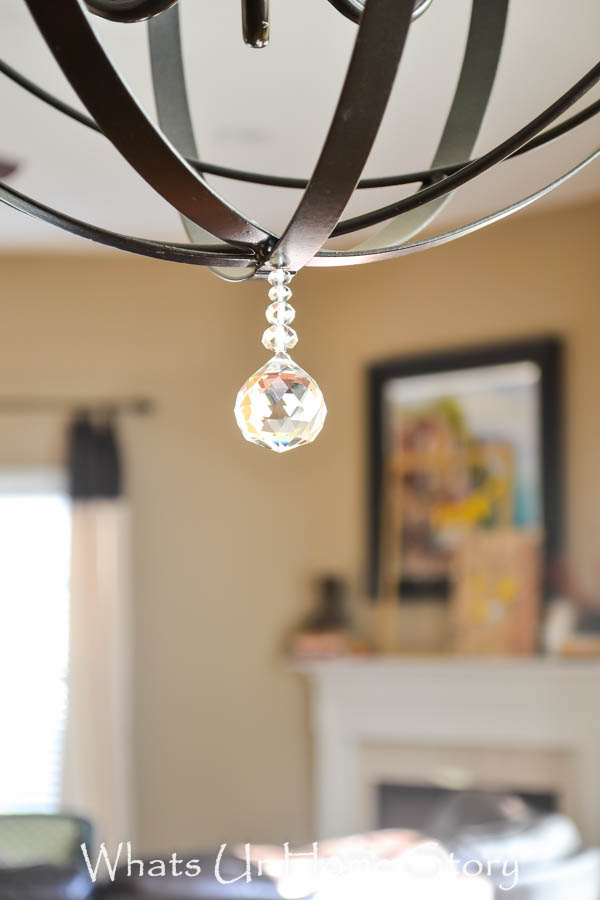
$40 for the whole thing, not bad right? I’m sure the high end one would have cost me around $300 for the same size!
Have you DIY’d a light?
Linking to;


Loved everything about this one Vidya, from the story to the last bit of crystal hanging. The idea, how well everything came together… Again, loved everything…
Thanks a lot Anima. We love every bit of the light too….
Very beautifully done Vidya!! Great job!
Loved this Vidya!!
Hey Vidya, The light looks beautiful. I love it.
This is awesome.. But I’m still trying to figure out how you were able to squeeze that inside the orb without taking it apart
Thank you Kim. Once we took the light bulbs off it was not too bad, had to be a little careful that is all.
So beautiful ~ well done! Now, wanna sell it to me?? 🙂
LOL! Thank you! Will definitely give you a shout out if I come across those orbs again.
Vidya
So beautiful…..you inspired me! I found the orb in Homesense today actually (and a smaller one of the same i might do up as an accent for something) But i’m worried, as the other lady mentioned, how did you get the light inside? Did you take some of it apart to squeeze it in? It looks really tricky…..any tips would be helpful as I’m about to tackle this on the weekend after I pick up the light insert friday (also from craigslist 😉 lets see if I have better luck than you!! lol )
Bobby,
Wow that is exciting. It really wasn’t difficult. We took the bulbs out and gently slid it in.You could most likely remove the white candle looking things too. They come off. I actually took the Orb with me when I went to pick up my Craigslist light and made sure that it would go in. Do let me know how it goes.
Vidya
What a great DIY. Looks so high end!
Thank you!
Love this so much then I’m trying to make one right now. But how in the heck did you drill a hole into the orb? I’m using titanium drill bits and I’m drilling until my arm is ready to fall off and I still only have a dent! Please help!
Tricia,
When we drilled we used a 0.5mm bit at the lowest speed perpendicular to the orb. Once you have a tiny hole gradually increase the size of the drill bit to make the hole larger. Hope this helps.
What’s the diameter of your orb? I have seen them at TJ Maxx but they are only 12″. Yours looks much bigger? I’m trying to find a 24″ orb.
Alex,
The diameter of my orb is 20 “. Hope you find the right size one soon.
Vidya
Thank you so much exactly what I needed. ..just bought an orb at home goods on clearance for $8….and this is what I wanted to do.
This is so beautiful! I would have thought it cost hundreds!
This looks great! I’m hoping to make something similar. How wide is the light from the chandelier?
Love this…well done!
Hi Vidya, your lamp looks great!! I’m putting mine together right now but the nipples bend, did you glue it at the middle to make sure they 2 stay together?
Casandra,
I used only one nipple that was tall enough for my light. You could buy a longer nipple, think that would be a lot cleaner than using 2.
Hi! Just wanted to see if you had a trick for spraying the inside of the orb?? I’m having problems getting paint inside without over spraying on the outside. Thanks!!
How about taping the outside and painting with a brush instead?
What type of drill and drill bit did you use to cut through the metal orb?
How big is the orb?
“When you look at things differently the things you look at change”…I bet I have seen these Orbs in the stores a hundred times, but never until now, it would have crossed my mind to do such a lovely project with it. Up until now, I thought, unlike the women here we are not handy when it comes to these finer fixtures, you changed it for me with this post.Thank you, for being such an inspiration…love everything about this Orb & your step by step instructions, how delightful!
When I saw this I just had to have one myself. Went straight to Home Goods not thinking that I’d find one of the orbs and I didn’t. I found 2! It took 2 days but I got one done. Thanks for your posting of it!
Wow! That’s awesome. Would love to see yours Candi. Please do send me the pics at [email protected]
Vidya
Love this DIY orb! I was just out looking at lighting and the saleslady told me that orbs lights are wildly popular and are her best selling lights. Looks like you were well ahead of the game. But the part of your post that is the most important to me personally is that you were able to find a way to recenter the light over the table. I have a situation in my kitchen where I need to recenter a light over a table. Can you please expand on how you accomplished this? And possibly add more photos. Really, I think it is worthy of its own article, as I have not been able to find any information about how to do this. Thank you so much.
Thank you so much Donna. Now that you suggested about it yes I will do a post on how to centered the light. Not sure how I missed it.
Vidya
Great post! Have nice day ! 🙂 bpvap
Great job! Looking to do something similar. Thanks for the great tutorial!
What an amazing upcycle! Im really inspired!