This time it is the basement guest bedroom wall.

First let’s get the formalities out. This is a review of the Japanese Birds Allover Stencil from Royal Design Studio. They have an awesome blogger support program where they send you one of their stencils free of cost for a review of the same. I’d already gotten fantastic results with another product of theirs, the Uzbek Suzani Stencil in my dining room. So I was more than happy to review another of their awesome all over patterns. Inspired to recreate the magic? You are in luck, enter the Royal Design Studio stencil giveaway for a chance to win a stencil worth $50!
Before we get into the nitty gritty, here’s another shot;

In an effort to avoid another 11hr stencil marathon, I tried using a roller this time. Much to my disappointment, it didn’t work. The morale of the story; if your pattern is intricate use a sponge. You can see what I’m talking about in the below shot (the upper right hand corner).

See how all the detail is lost in the roller strokes? After a few “What was I thinking?…..At least I tried.” self pity sighs I trudged on. Back to my tried and trusted sponge method. Another stencil marathon ensued, albeit a shorter one this time, 7hrs. 🙂 Hey, that is an improvement. 🙂
The only thing I did different from last time was that I did not use the temporary adhesive spray at all. The painter’s tape worked great. Aligning the pattern was tougher than last time. Maybe my not so straight wall might have contributed to that as well?
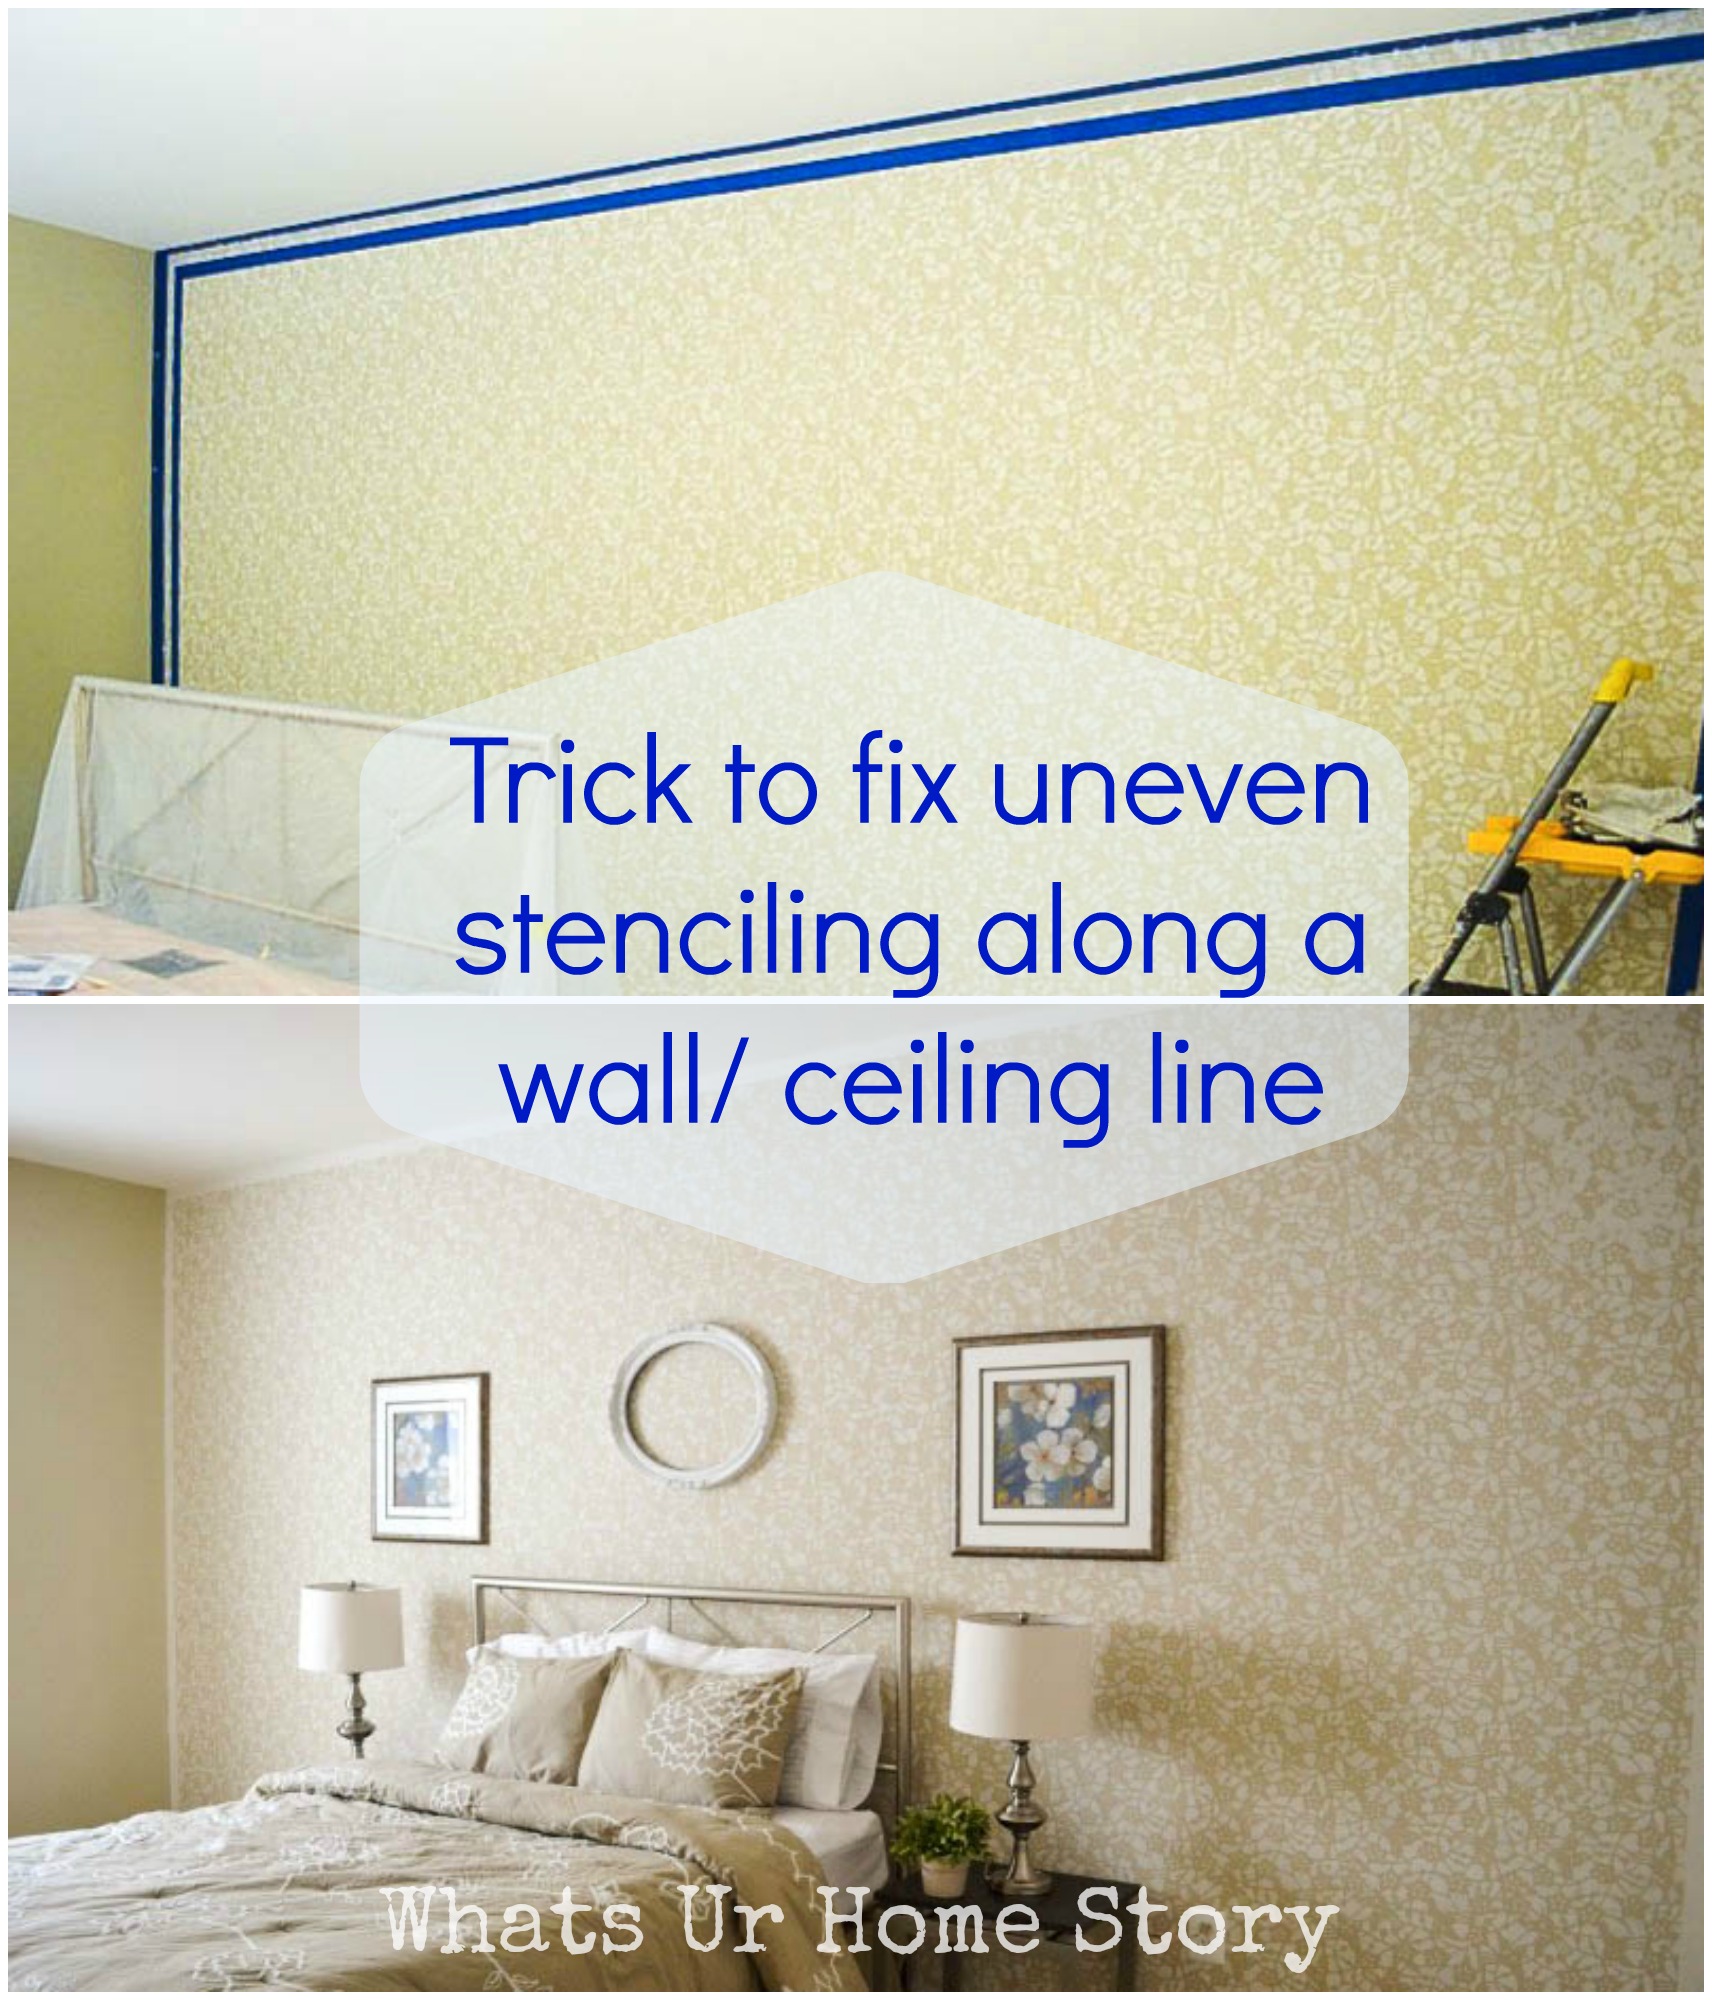
All was hunky dory till it was time to finish off the two sides and the ceiling line. The Japanese bird stencil came with a smaller pattern strip to help with the tricky ceiling line (which the Uzbek Suzani didn’t have).

Sadly the strip couldn’t do much. This is what I ended up with.

Again, my uneven walls may have magnified the issue. Instead of just lining up the edge of the stencil with the wall when I started (see below) I could have offset the pattern a little bit, which would’ve solved the ‘sides’ issue.

The solution – we taped off 2 inches with painter’s tape to make a border.

I then used a sponge brush to paint a white border all around, which concealed the irregularities.

A closeup of the pattern,

I have more plans for that side of the room, like bringing in some color, adding storage under the end tables and eventually finishing off the whole room. So stay tuned. Don’t forget to enter the giveaway for a chance to win a Royal Design Studio stencil (runs till 9/12/12)!
Update: See the final reveal of the room here.


Vidya,
Loving the total look. I knew you would pull it all together and u did! And u did that in style !!!! Love the colors and the pattern. Another success story!!
Thank you Anu. I was kinda worried how the sides and ceiling line would turn out.
Vidya
Wow! It looks great. I have yet to try stenciling.
Thanks Jae. I had been planning this for a long time but after my last wall stenciling outing got the courage to dig into another one only now. 🙂
Vidya
Wow, I love this!!! In fact I think I need to get that pattern for my bedroom. And I love the colours you chose – very calm and relaxing. Plus even though you didn’t plan it, the border makes it look very professional. Well done.
Thank you Heather. Ya, the border was a happy accident. It did take 3-4 coats though to cover up all the stenciled paint.
Vidya
wow vidya chechii.. this is awesome!! loved it!!
Thank you Karthika!
Vidya,
Excellent work!! I really loved it. Greys, whites and a tint of blue (in the picture) all pulls together to a marvelous job well done. Keep going.
Thank you so much A. I bought those pics for the upstairs hallway as soon as we moved into the home. Sadly the size didn’t work out but didn’t feel like returning it. I’m glad I found a place for those prints.
Vidya
Wow, that looks amazing! I may have to give it a try!
~Katy
Katy,
Thanks for dropping by and taking the time to comment. Glad you liked it.
Vidya
Love the border idea! Such a good way to finish off the wall. Love it.
Sarah
Thank you Sarah! Wow, don’t you love it when accidents like these have a happy ending!
Vidya
Love the color choice for the wall and stencil highlights.. can you share the paint colors with us
This makeover is so lovely!!! The room looks fabulous.
Thank U!
this room looks like a picture from a BH magazine, excellent choice of colors, so neutral and soothing. IMHO, I am not so much a fan of that newspaper art. Its doesn’t go with the calming vibe of this room.
good work!
Aww..thanks Sudhaa. Totally agree, the newspaper art wouldn’t go there. It is not for this room. Most likely that will go in my planned studio. One day, I just had the itch to do it and wanted a place to hang it to show you guys the project. Working on a lot more projects for this room. Will keep ya posted.
Vidya
I think it looks fabulous… Oh I know the stress of getting to the end of the wall, my it is a difficult thing to get it just right, I really dont know how other ppl make it look perfect… Your white border is awesome.. great idea. I did a large floral damask and there are some boo boo`s , in the top corners for me were the worst… plus I broke my favorite chair…LOL.. and have the bruises to prove it . It is a fun project for sure.. I could go stencil crazy. The more I look at what other ppl have done, the more I want to try… What`s next for you?
Aww..thank you. I’m giving stencils a break for now. I did a stenciled fabric throw pillow earlier. I’m kinda into refinishing furniture now. Got a big project lined up. Would love to see pics of your stencil. Please do share. You can email then to [email protected].
Vidya