
How was your weekend? We had a nice and relaxing 2 days, met up with some old friends and took my folks to see the Luray caverns. Though this was my 5th or 6th time visiting just like the nearby Skyline Drive I’ll never ever get tired of going there. If you haven’t been to these caves then you must; it is the largest of such caverns in the Eastern US. You really can’t express in words how beautiful it is. The Dream Lake inside the caverns;

Coming back to today’s post we have one more chair tutorial left, on how I sewed the seat cushions. As I mentioned earlier, this is not what I would call a beginner sewing project. Neither is it the most difficult one in the world. But you do need some patience and planning to get this baby going.
Materials
Fabric – I got the fabric back in November from Mary Jo’s in Charlotte and totally forgot how many yards I got. Cording to make the welt cords (tutorial here) Sewing pinsTutorial
- Using you chair seat or old chair seat cushion cover as a template trace the shape of the cushion onto the back of your fabric and cut out.
- Sew a single welt cord long enough to go around your seat cushion. You can find the instructions for the double welt cord in this post, for the single welt cord you’d stop after you cover the cording once.
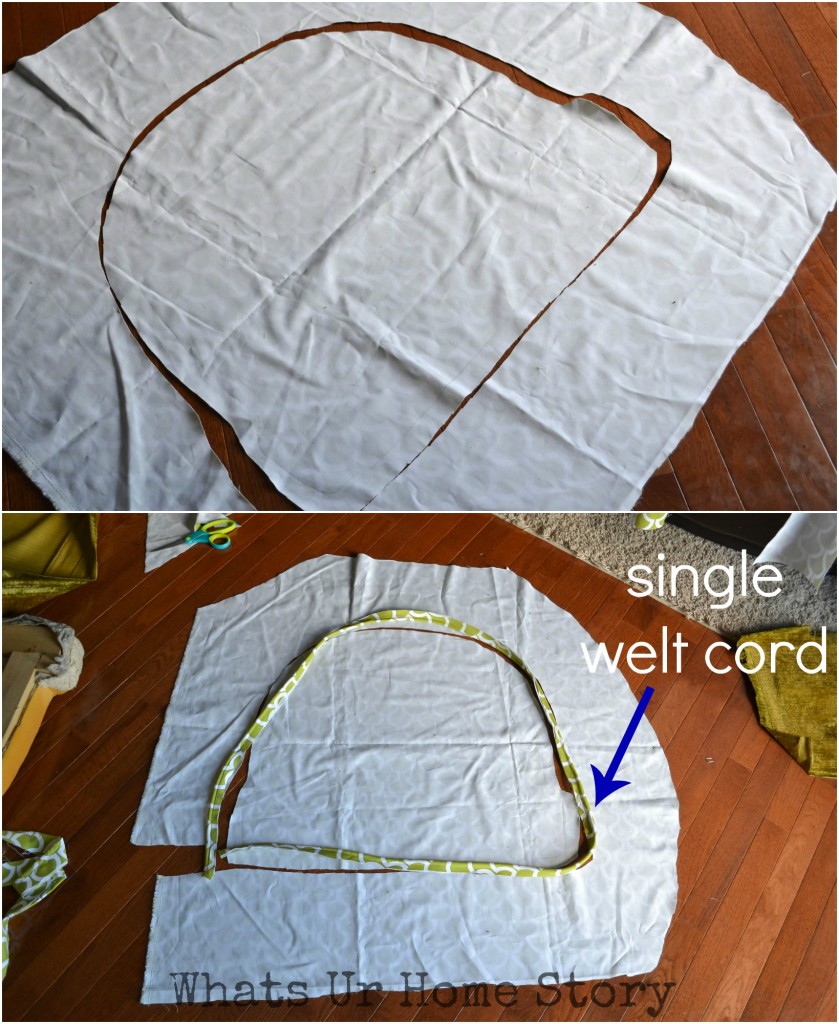
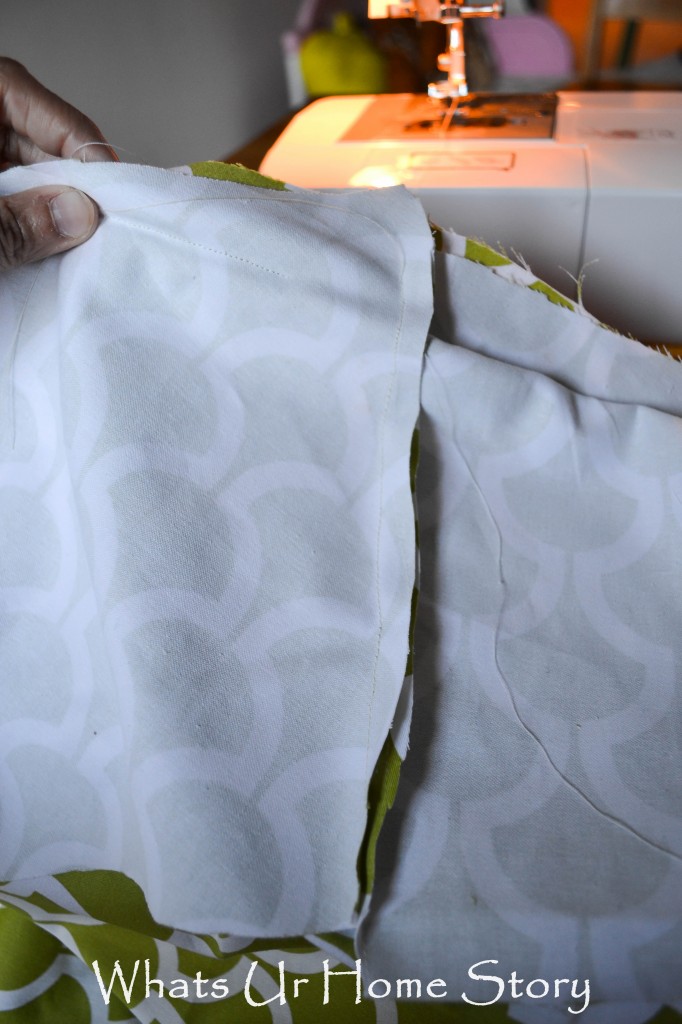
- Pin the cord as close to your template line as possible to the good side of the fabric and sew along the edge using your sewing machine’s zipper foot. Start at the back of the seat taking care to leave some cording at the beginning i.e. you don’t start sewing from the end of the cord. Start only from an inch or two below the end of the cording (see pic below).
- Sewing the cording along the contours of the cushion can be tricky at times, so take it slow and use your pins as guidelines.

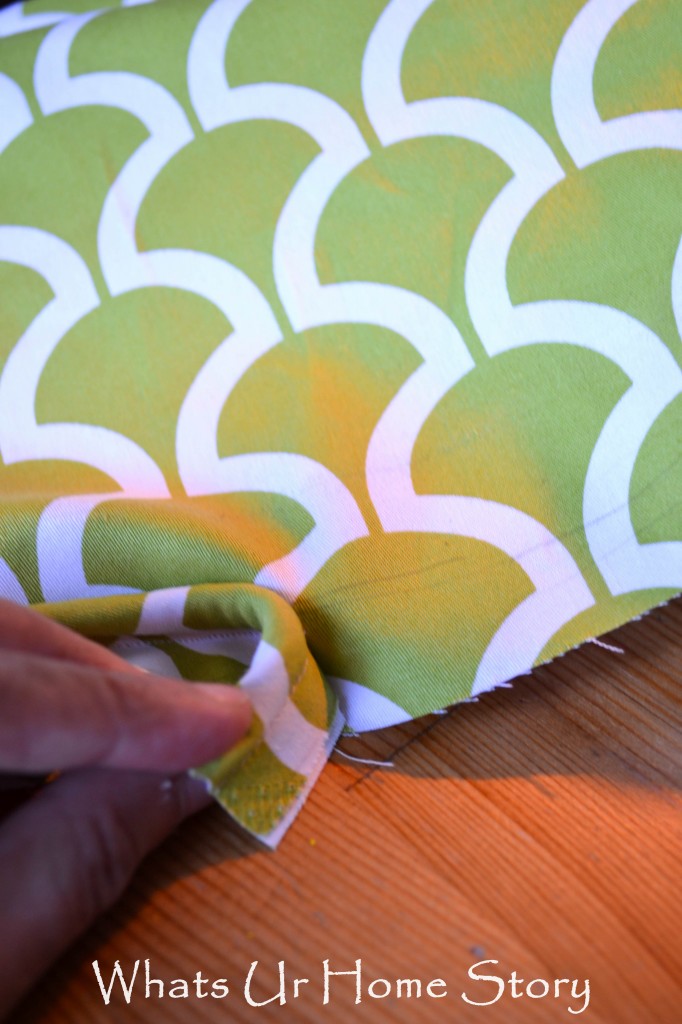
- When you reach the other end of the cording leave about an inch and a half of cording and cut off the rest (follow the blue arrows in the below pic). Top Left
- Open the seam on one end to reveal the cording (Bottom Left) till you reveal enough to line up with the other edge (Top Right).
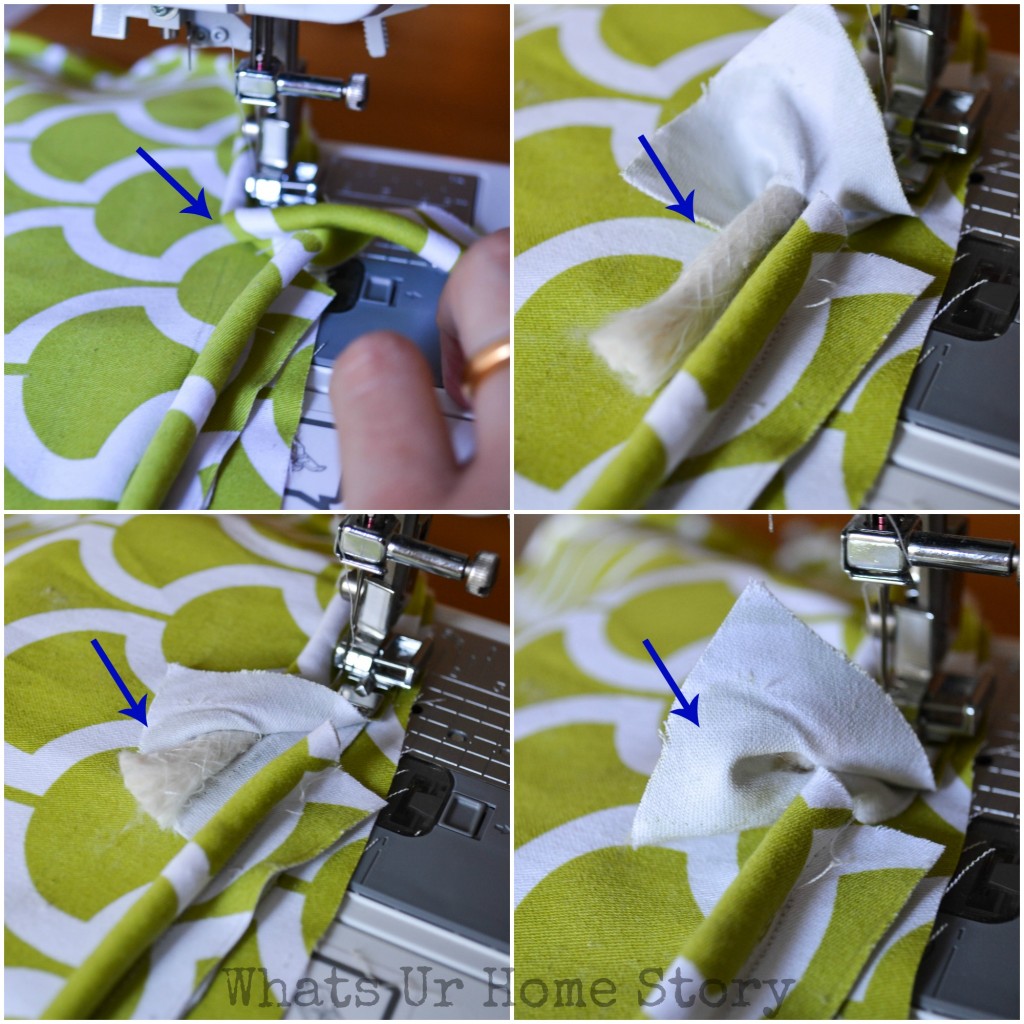
- Cut the revealed length of cording. Now the other edge of the welt cord should fit snugly where the cut off cording was. Bottom Right of the above pic.
- Fold the excess fabric on itself to make a clean seam and sew. This is to ensure that your welt cord joint is as clean looking as possible.
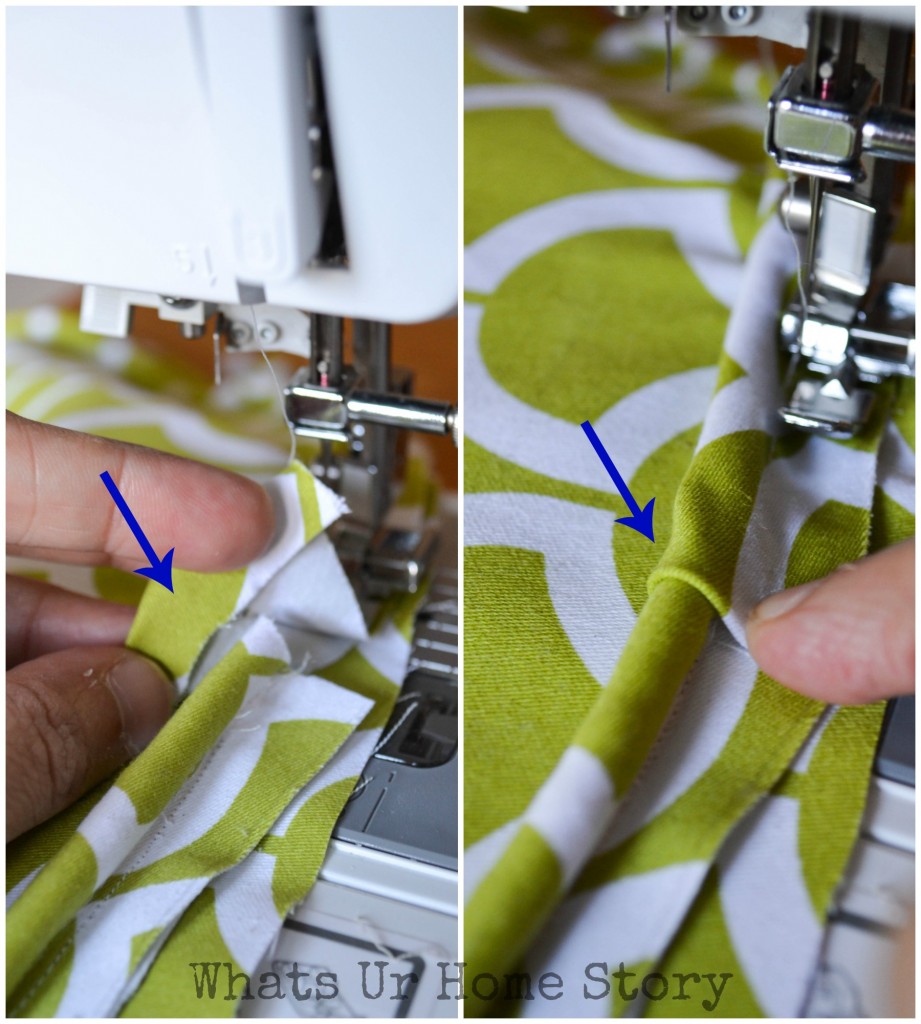
- Once you’ve sewn the welt cord all around, the seat cushion should look like this.

- Cut strips of fabric that are wide enough to cover the width of the seat cushion. Sew the strips together so they are long enough to cover the entire perimeter of the seat cushion.
- Align the strip to the seat cushion to get a good continuation of the pattern taking care that the strip joints are in inconspicuous places. For ex. you wouldn’t want to see a seam right in the middle of the cushion. Use the below pic only as a reference. I ran out of fabric and had to use whatever piece I had left over aka. neither is the strip the right width nor does the pattern match. It is to give you a general idea of how the cushion looks after you attach that piece. Did it right for the first one but forgot to take pics.

- At the back of the seat cushion sew the fabric strip ends together to form a nice and fitted cushion.
- Trim all the excess fabric and flip it right side out.

- Carefully fit it over the seat and staple and call it a day!
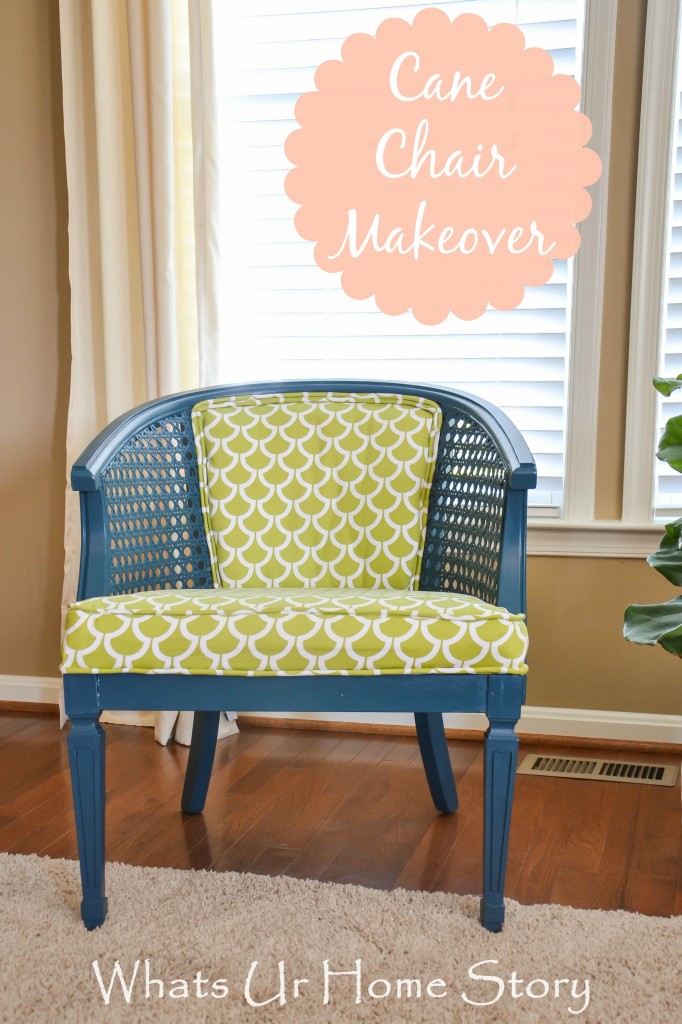
What do you think? Not too bad of a project, right? Do you think you can try a hand at sewing a seat cushion with piping?
For other posts related to this project see; Reveal, How to Paint a Chair, How to Reupholster a Chair


I went to Luray for my second time about a month ago. Its so beautiful!
Is it is? Love Luray any day!
Great tutorial! I am pinning this! See you at Haven! 🙂
Thanks Lauren. See you at Haven!
How wonderful. I found your article and was delighted to see your description of the Luray Caverns. Back in 2007 I came to Virginia to a meeting at George Mason University and on one of our free days drove to Luray along the Skyline Drive. It was a magical experience. We also visited a quaint tea room in Luray that looked as though it was straight out if the 1950s. Happy memories and thanks for the clear instructions too.
Yes, we love skyline drive too. We try to visit every Fall to see the fall color. Thank you Elle! This is a post about our 2012 visit – https://www.whatsurhomestory.com/fall-color-in-virginia/