Hope you all had a great weekend. Ours was quiet and nice. It was great to finally be at home and just go about the usual stuff. As promised the tutorial for the DIY burlap wreath;

Materials
Wreath Frame – 1 Plain Burlap Ribbon – I used 3, depending on how full you want your wreath to be you may need more or less Chevron Burlap Ribbon – 1/2 a roll Pipe cleaners For the Letter Wood Alphabet of your choice Mod Podge/ Craft glue Dried Moss We got all of the stuff at Hobby Lobby. For the Pinterest Craft Night, Amber found the tutorial at The Sassy momma. Oh, and it took me 20 mins max to make the whole thing.
Process
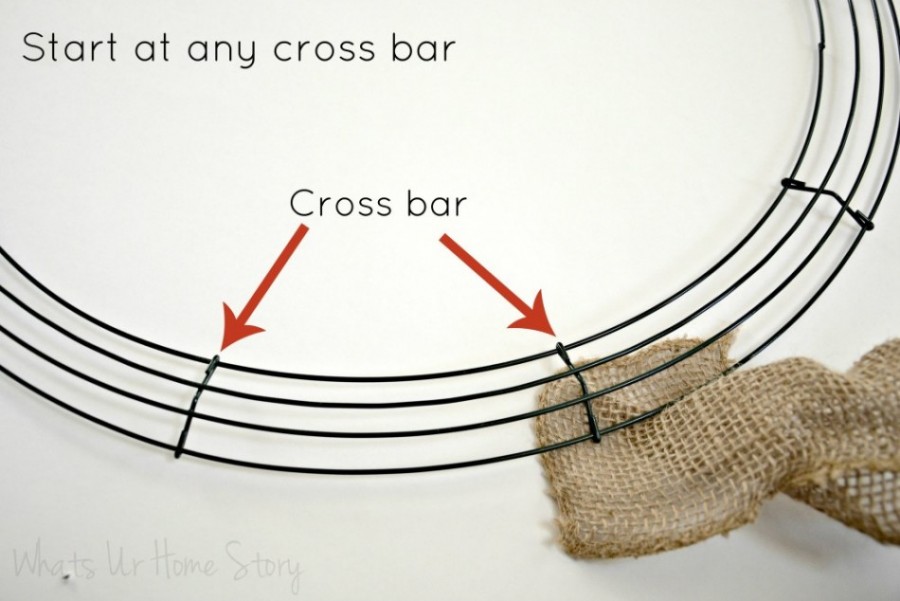
The thing to remember when making the wreath is that we always work from under the wire frame and push the loop over the frame.
- Start by securing the burlap at a crossbar (see below) with a pipe cleaner. Do not twist your pipe cleaner hard, just a turn to keep it in place is enough (we need to use it later).
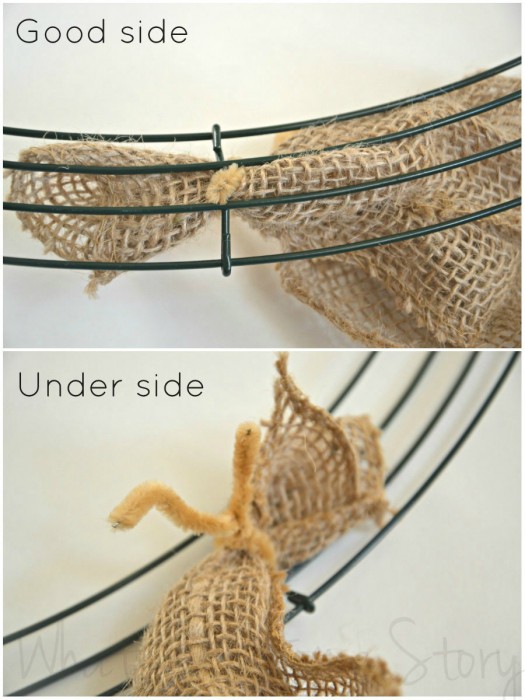
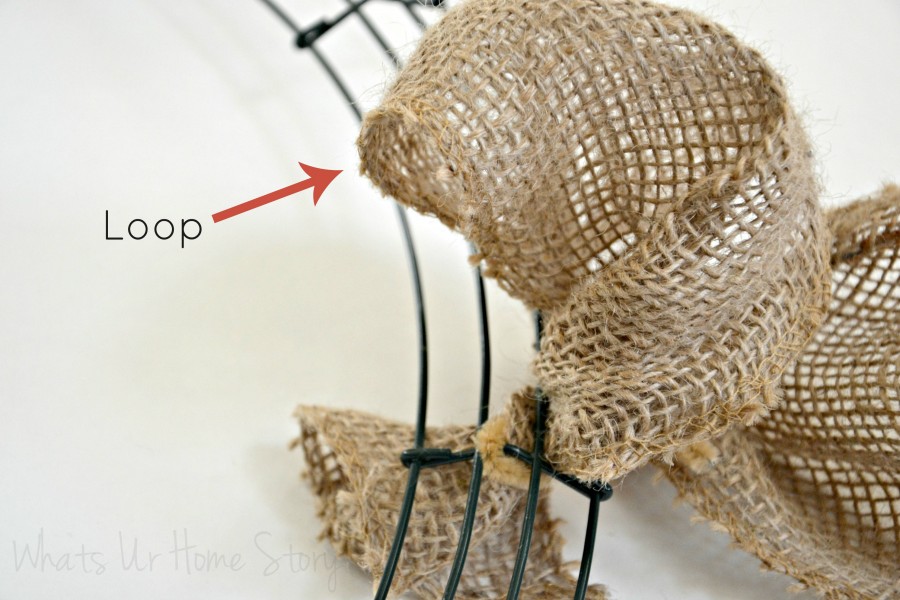
- Push the ribbon through the outer circle slot (doesn’t matter whether it is the inner most circle or outer, just be consistent with the order) to form a loop like this.
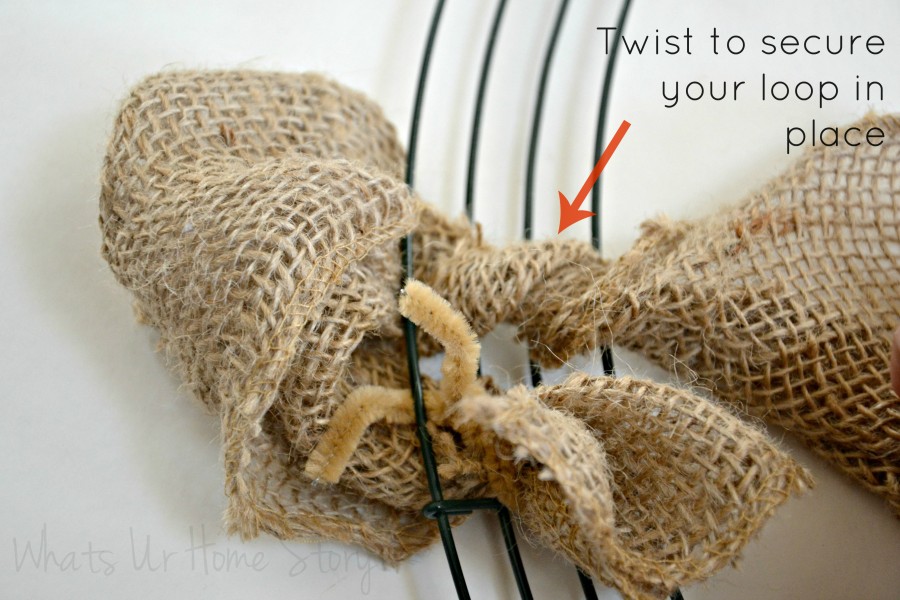
- Once you like the look of the loop and its size twist the other end that is under the frame to secure your loop in place.
- Next make your second loop by pushing the ribbon through the inner circle.

- Repeat the twist and loop. I made my third loop through the center circle to make the wreath look even.

- When you reach the next cross bar secure with another pipe cleaner as in step 1.

- If the ribbon ends before you hit a cross bar secure it tightly with a pipe cleaner to the frame and start the next one where the previous one ended.
- Repeat till you fill the entire frame. Fluff up the loops to make it look full and even. There you have it, your burlap wreath. You could use it as is without any embellishments.
- If you plan on adding the chevron ribbon then don’t bother about fluffing the loops in place as we can do that once we string the chevron ribbon.
- Start your chevron ribbon at the cross bar as we did with the other one in Step 1. Secure the chevron ribbon using the original pipe cleaner to the cross bar, this time tightening it well.

- Repeat at every crossbar. When you are done, fluff up your loops so that they look evenly distributed through the frame.
- For the letter; cover your wooden letter with craft glue or Mod Podge and glue on the dried moss.
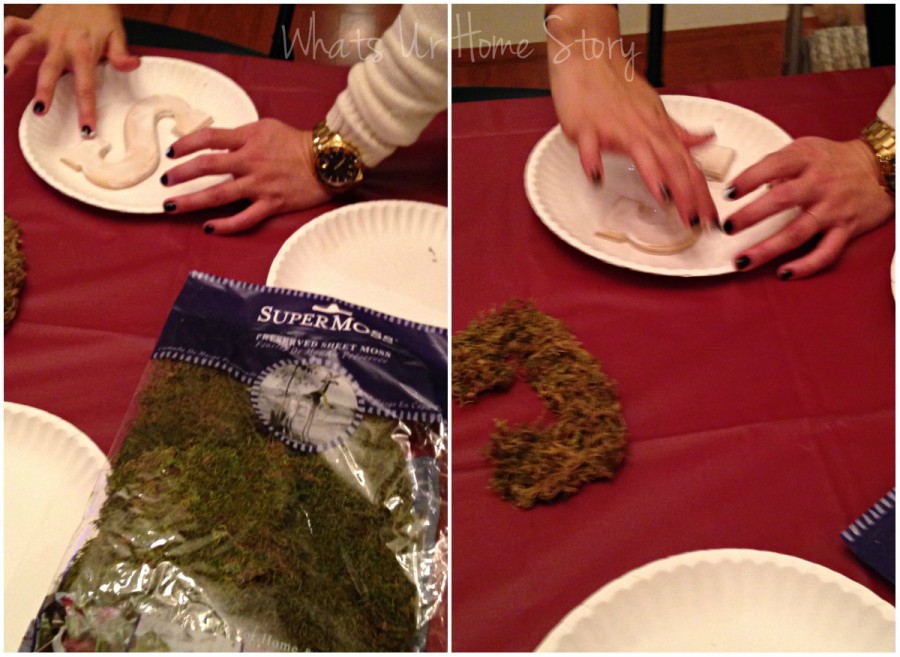
- Once the moss is dry hot glue a pipe cleaner to the back of your letter. Secure it to the wreath and voila!

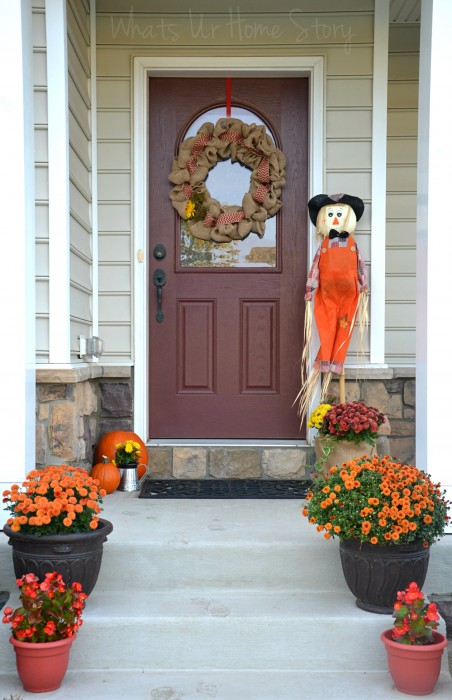
The wreath is so versatile that you can dress it up with anything; flowers, feathers, pine cone etc. I plan on changing up the embellishments with each holiday. Here it is adding charm to our fall porch.
Do you decorate with wreaths? This is the first time I’ve owned a wreath and I’m hooked.
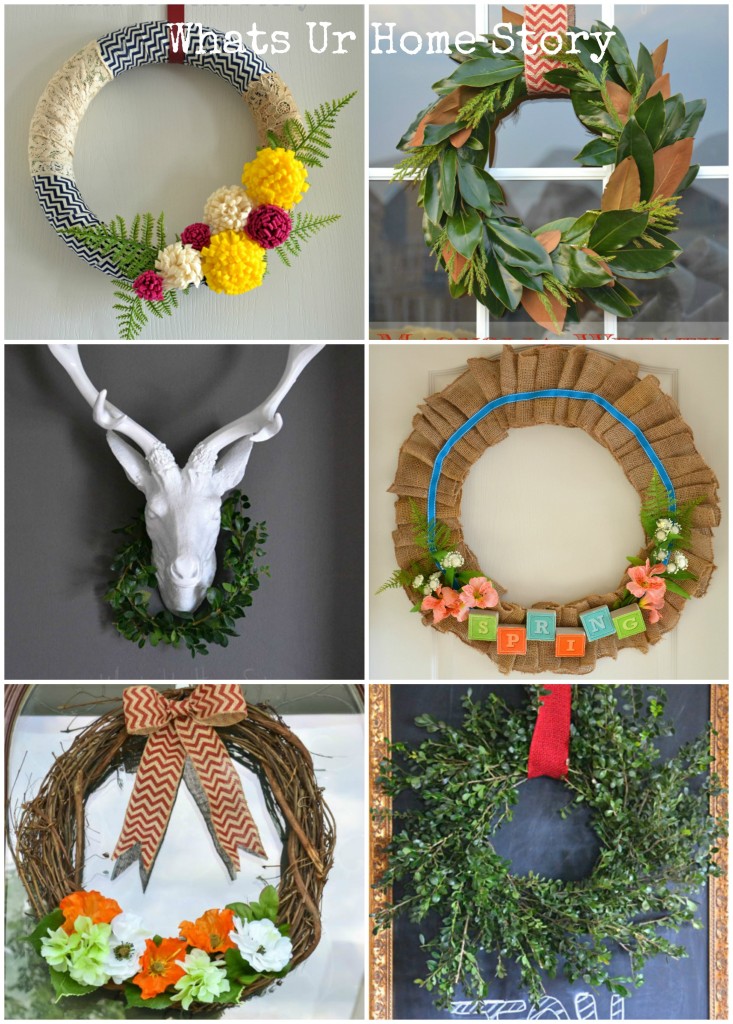
My other wreath projects


I am going to try it tonight……Thx for posting the tutorial
Thanks Sherry. Do share the pics of your wreath.
Vidya
Thats really a cool Wreath. How much time did you spend in making this? Just Curious
Thanks Sarah. I guess 20 mins max.
V
Love this wreath! I have to make one for myself – 🙂
My wreath came out beautifully! It did take a bit longer to make then 20 minutes, but that may have been because I purchased a larger wreath frame. Thanks for the great tutorial! Here’s a link to a picture of the final product https://www.facebook.com/photo.php?fbid=851209812225&set=a.502788755815.2014997.67402813&type=1
About how much do you think this costed you?
Love this…. thanks for the tutorial.
What width plain burlap ribbon did you use? How many feet were the three rolls you used?