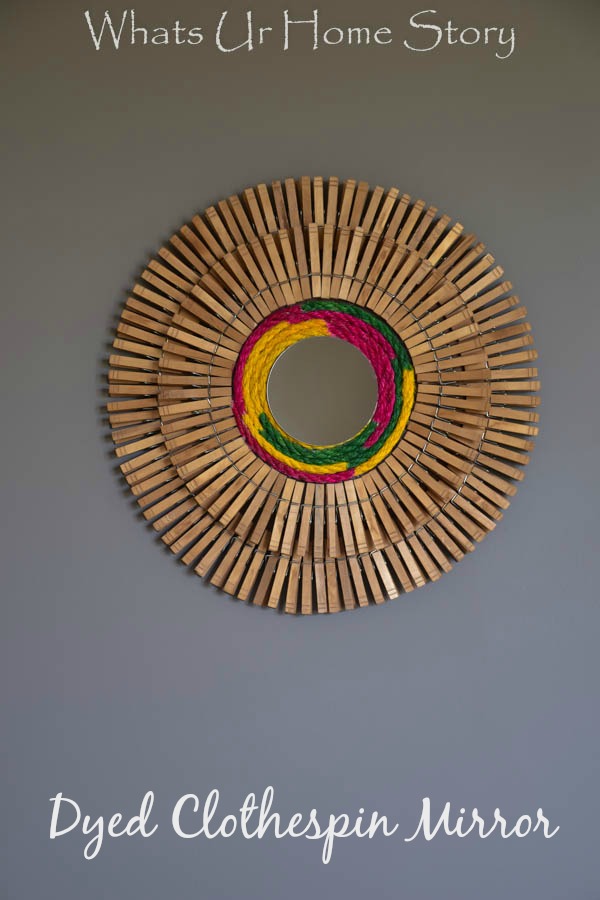
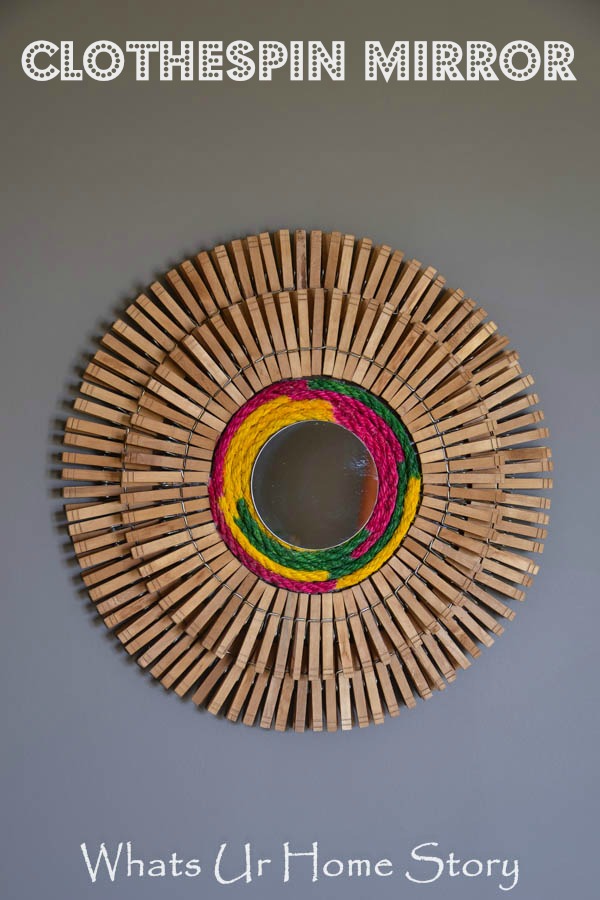
Happy Monday! How was your weekend? I’m fresh off a nice DIY weekend where I was able to finally cross a few projects off my To Do List thanks to an activity free weekend. Ok it was not entirely activity free if you count the kids’s sports and dances. Still, a weekend with enough downtime for some DIY is like my absolute stress buster. Kicking off our DIY parade is a Clothespin Mirror.
Ever since I made my first sunburst mirror I’ve been itching to make another one. The problem was we really didn’t want another mirror at home and so I put the idea on the back burner. Months passed by and then one day I was looking for something to gift to a friend who is also into DIY and the light bulb went on! Do you have friends who DIY too? What do you gift them? I always find that I have go the extra mile and make something special for them like this bird cage planter. Slowly the clothespin sunburst mirror idea took shape.
I wanted an earthy yet colorful feel but was not sure how I would get the clothespin to look old and earthy. My first instinct was to stain them with staining clothes but that didn’t work. Right around that time I came across my friend, Candace’s (from the blog Rusted Roots) post about tea staining the pins to make them look old. And bang the project was back on.
Materials
Clothespins – Around 200 ( I got mine at the Dollar tree but later found that Walmart had them at a slightly better price) A 15″ (diameter) round cardboard/or thin piece of pressed wood like in a clipboard 12″plastic platter – Dollar Store Sisal Rope – Home Depot Acrylic Paint Glue Gun Small Mirror – Micheals Copper Wire – Left over from my son’s science project Drill Loads of Tea bags & Coffee By the way my mirror is 20″ in diameter.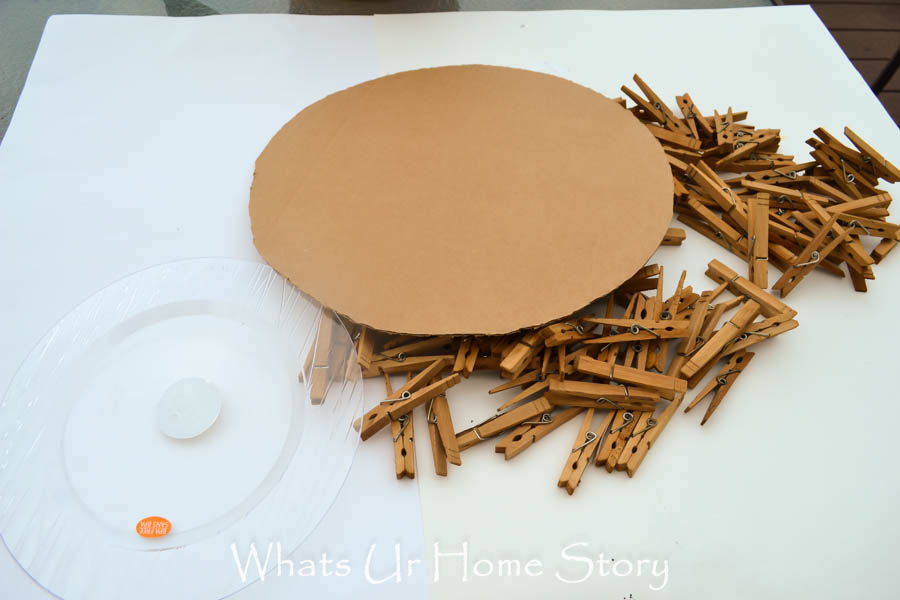
Method
- Boil a combination of tea and coffee in a large pot. I had both loose tea and coffee at home not bags so don’t know how much I used. You need to make the water as dark as you can.
- When the water boils slowly add the pins and let them simmer for 20-30 mins.
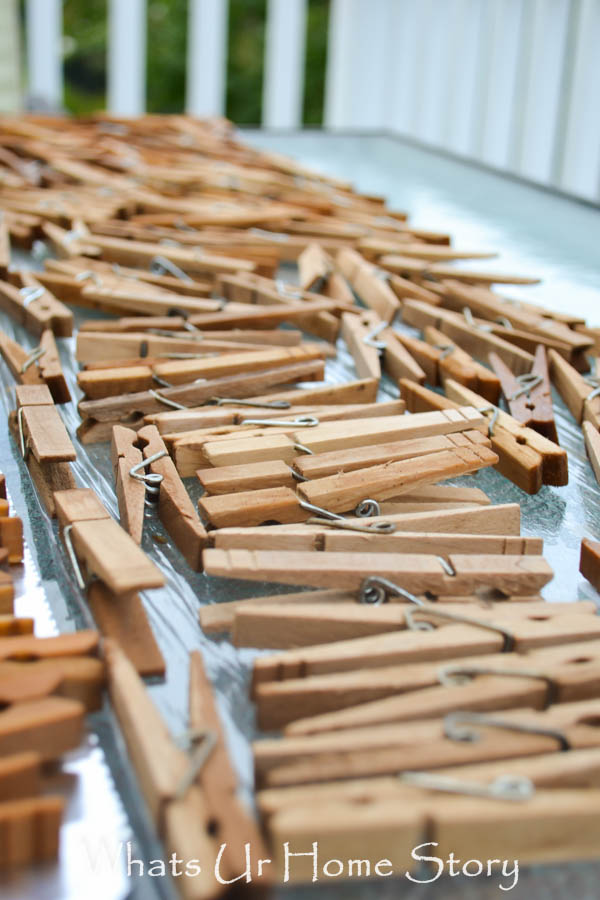
- Take them out and dry on a piece of plastic wrap. They look really dark (that is the color I wanted) straight out of the pot but dries to a very light color. So don’t be disappointed if they don’t retain the original color or the shine. Unfortunately simmering them longer won’t make them darker, that is just how they are. Trust me I tried it and the only thing that happened is it took an extra day for those pins to dry.
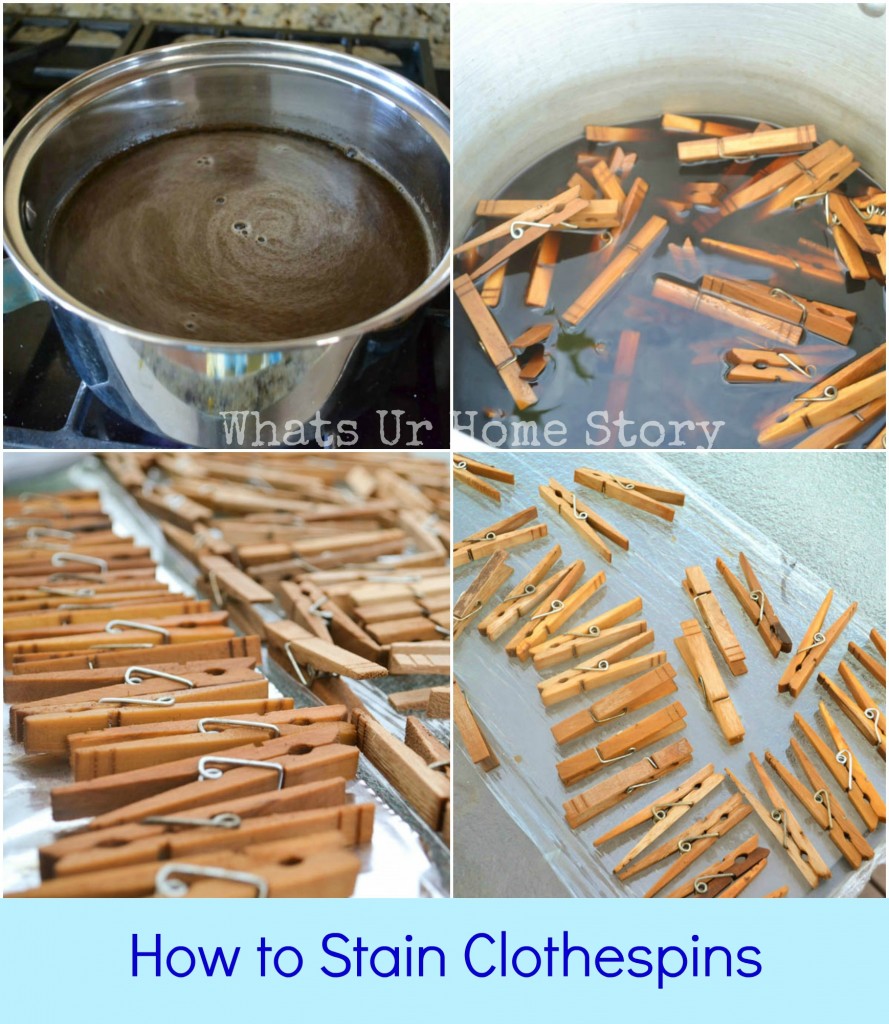
- Dry the pins overnight or until they are perfectly dry. Airing them out for a few days will take the Tea/Coffee smell out of them.
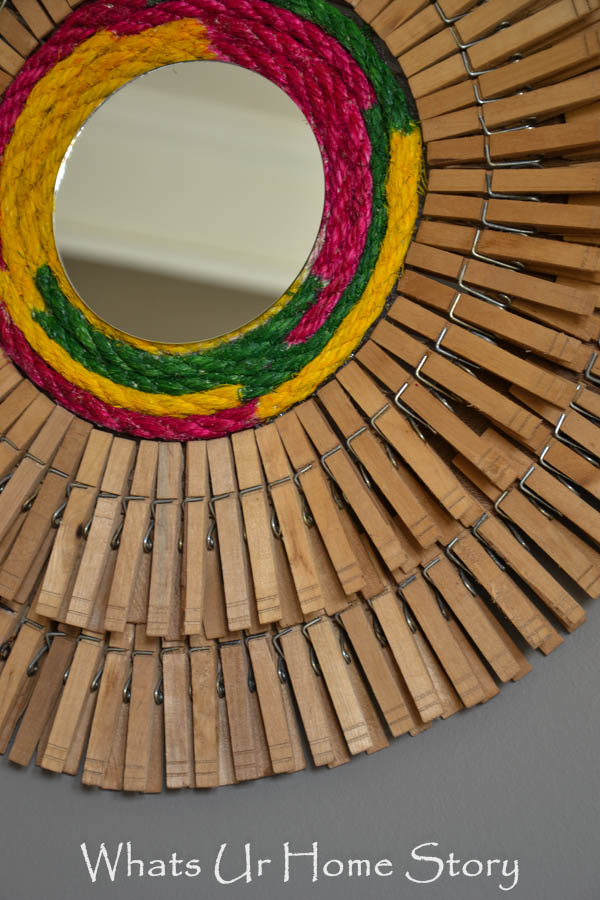
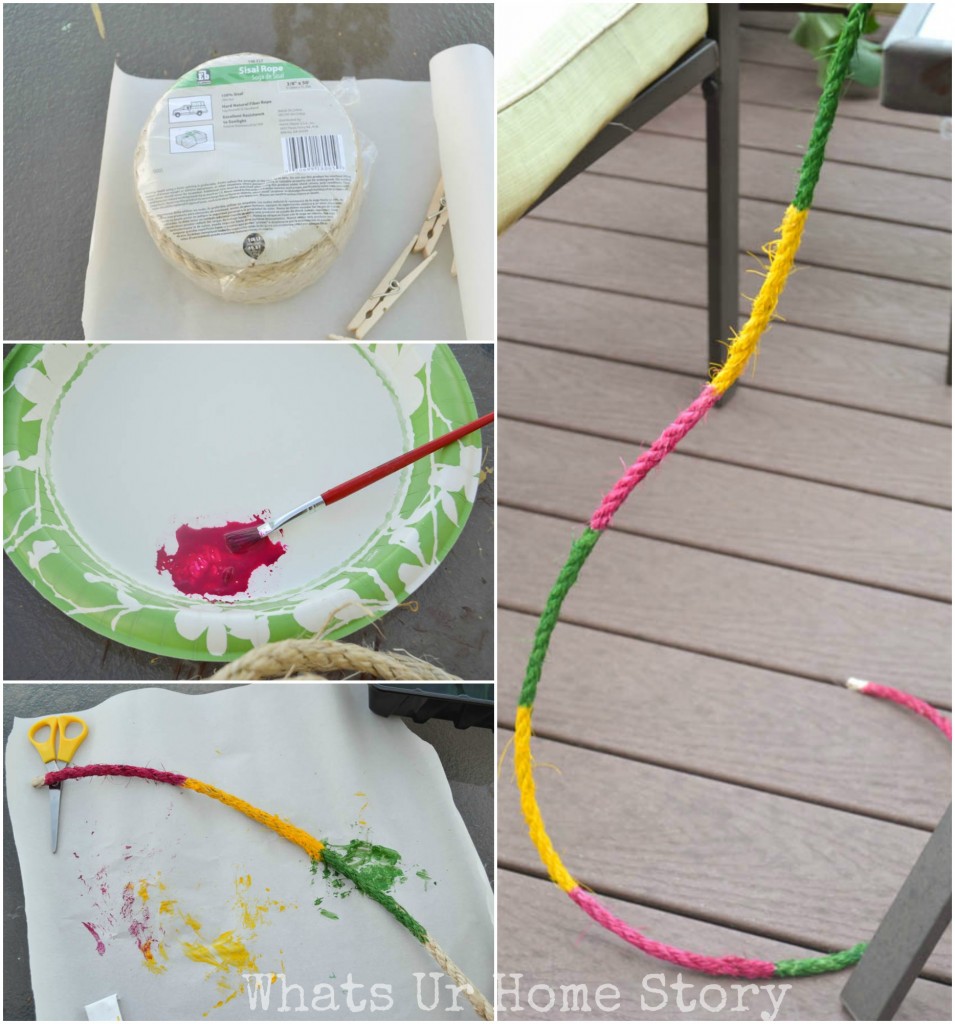
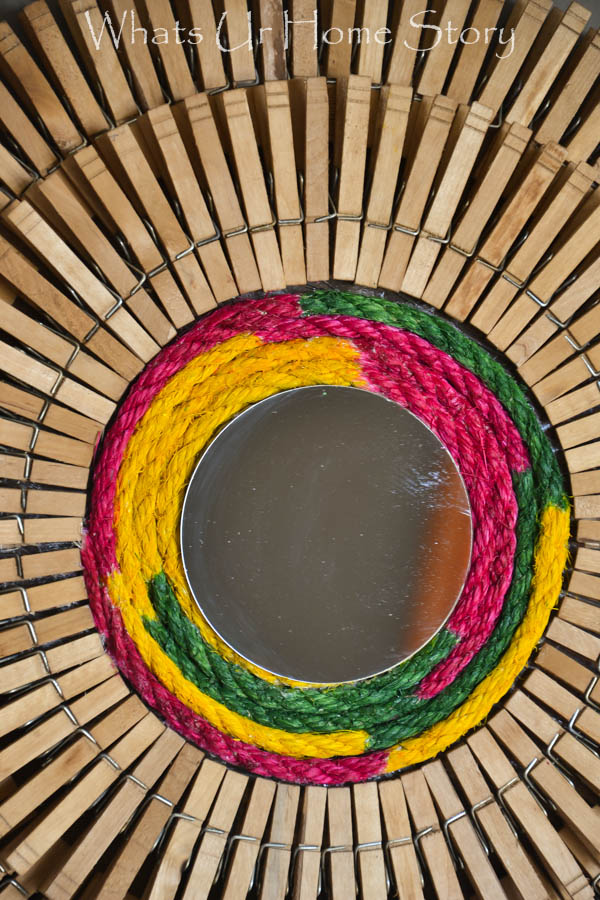
- While the pins dry, paint the sisal rope in sections with acrylic paint. I used Fuchsia, Yellow, and Green.
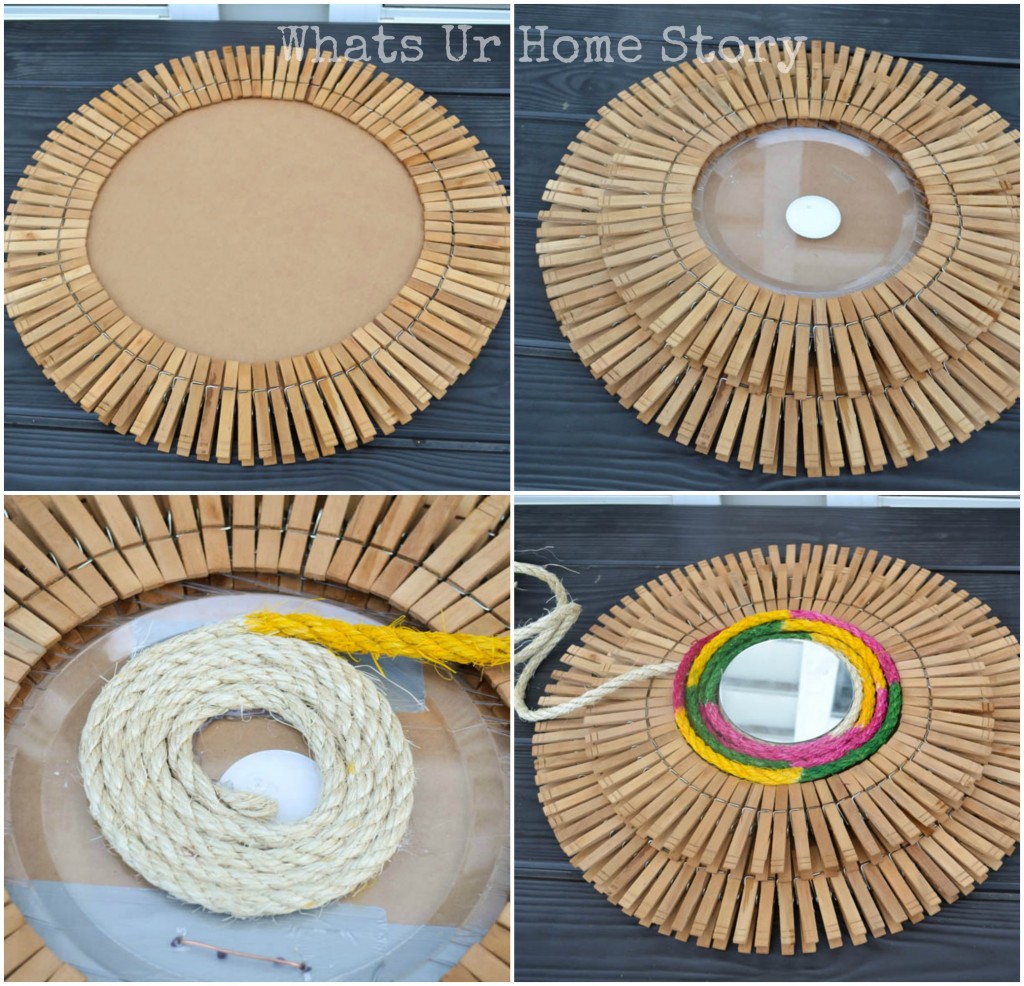
- Now comes the tough part, dry run. i.e. Before we actually glue anything down we have to first see how things fit. So attach the pins to the bigger cardboard round and to the platter and center them to see if you’ve got the alignment right.
- Also starting at the center slowly roll the rope around tightly to see how much of it you’ll need. Don’t worry about the unpainted rope in the middle as it will be covered by the mirror. Doing this gives you an idea of how much length you’d need to paint of the rope.
- Once you’ve got the rope measurement right undo the rope.
- Drill 4 holes (2 on the top for the hook and 2 on the bottom for stability) into the platter and the cardboard/ wooden board base (see pic). Now string the copper wire through the holes and tighten it on the back securing the plates in place. Make sure to make a loop/hook for the top to hang.

- Start in the center and glue the rope down with the glue gun till you cover the entire open area between the clothespins. You’ll have to do some squeezing to get the last part snuggly in.

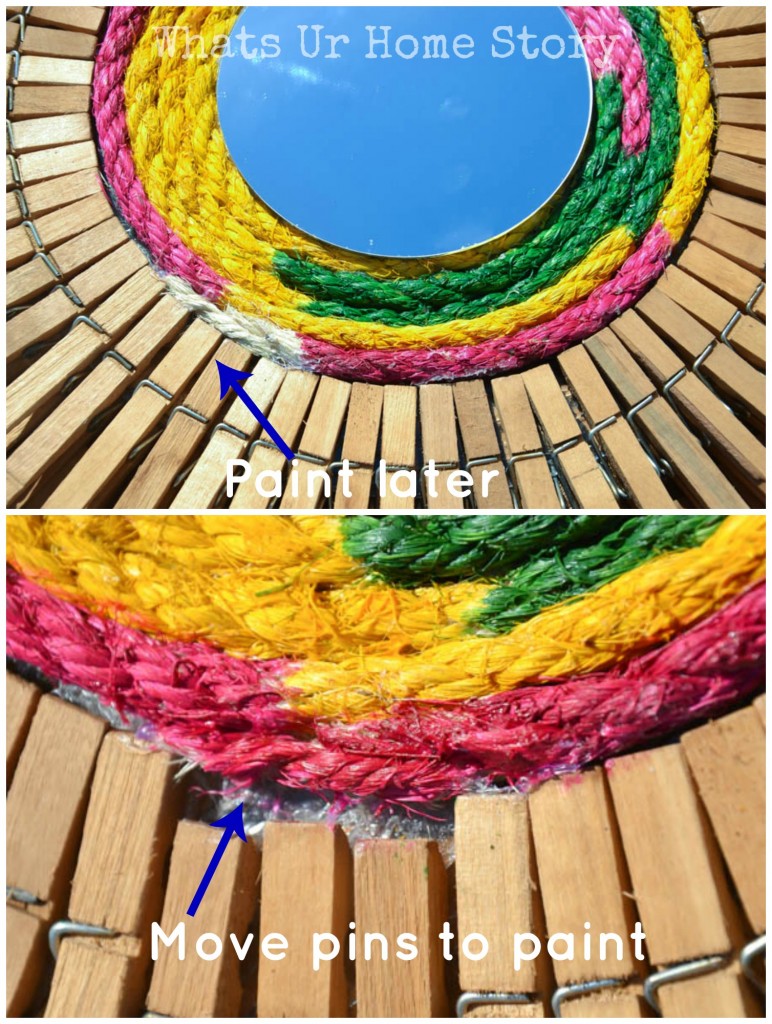
- No worries if there is a gap as you can always cut an extra piece of rope and glue to fill it in. That is exactly what I did with mine. I pulled the pins out a bit to paint the extra piece of rope so it would blend in with the rest.
- Hot glue the mirror down to the center and call it a day! Yay!
- Oh and you can go back and touch up the paint anytime if you want it darker.
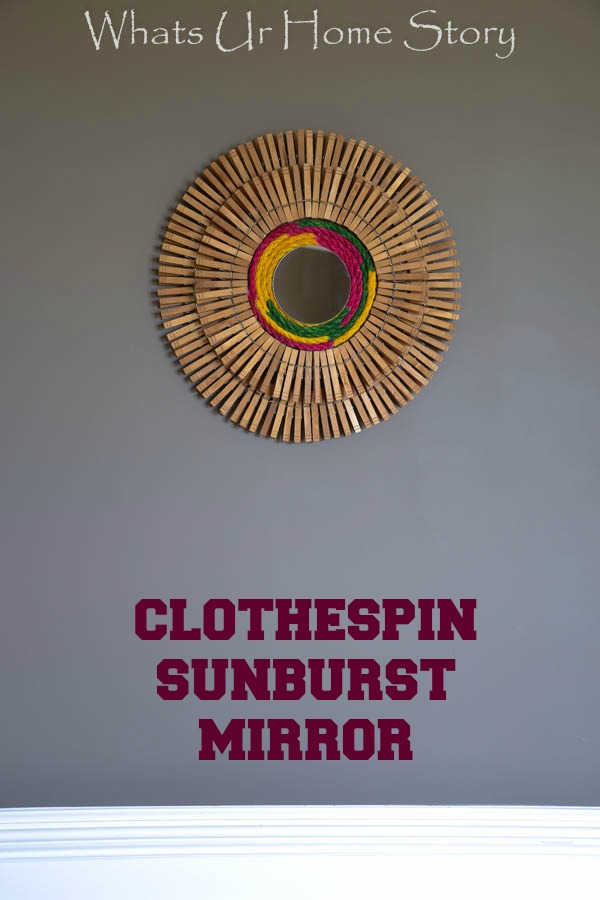
I like how rustic and colorful it is.
Are you a sunburst mirror fan too? Have you made any projects with clothespins?


Yay, Vidya!!! So glad you got to try the tea-stained clothespin idea!! So easy, right?!! And you’re mirror turned out stunning!!! I’ll be using some of my tea-stained clothespins to hang tees in my new shop!! They have such a great vintage feel!!! Thanks for the shout-out, friend!! 🙂
My pleasure Candace. The tea trick worked so well!
This looks very pretty Vidya.. Super DIY
Thanks Nayana.
Beautiful! I love sunburst mirrors too. May be this is the one I try my hands on. Thanks for the detailed instructions.
Vidya, This is a neat DIY. I like the painted rope idea.
This is cool looking. I love it
Hi. Didn’t putting the wooden clothespins in water for 20-30 minutes make the wood swell?
Hi Cleo,
No, they didn’t.